Your first stitches don’t have to be perfect. They just have to happen.
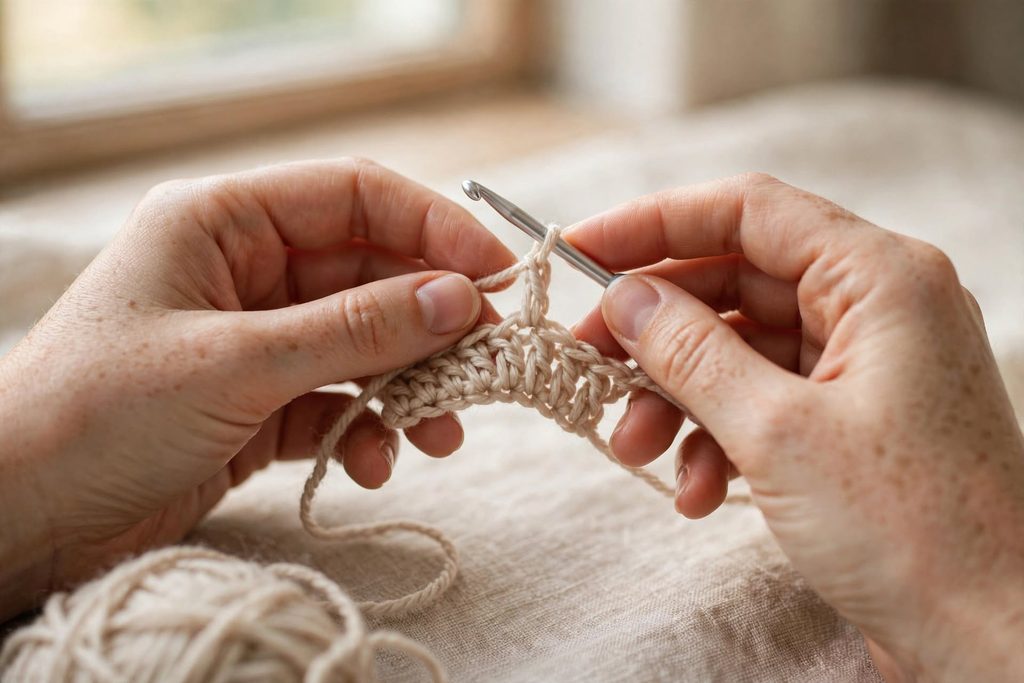
What if the most complicated thing about crochet isn’t learning the stitches — but deciding to begin?
We’ve been trained to believe that making things requires permission. A certificate. A course. A grandmother who passed down the secret knowledge on a rainy Sunday while the smell of soup filled the kitchen.
We look at a crocheted blanket and see skill, patience, and years of practice. We see the finished object and assume the journey must have been equally complicated: tangled yarn, abandoned projects, and hooks thrown onto the sofa in quiet frustration.
But here’s the part that changes everything: you don’t need to understand every crochet stitch before you start. You need to learn a few basic movements, repeat them patiently, and give your hands time to catch up with your intentions.
The blankets, sweaters, and intricate lace that look as though they were made by fairies with engineering degrees are built from simple techniques combined in different ways.
The magic isn’t in the complexity. It’s in the accumulation.
And the only thing standing between you and your first finished piece may be the belief that you need to be good at this before you begin.
You don’t.
The Permission Problem: You Don’t Need to Know Everything
Walk into a craft store and the crochet aisle can feel like a foreign country.
Hooks come in different sizes. Yarn labels mention terms such as worsted, aran, and fingering. Patterns are filled with abbreviations: ch, sc, hdc, dc, and sl st.
It looks like a language. It looks like a club with a password.
But crochet isn’t a language you must master before speaking. It’s a language you learn by using it.
You make a chain before you fully understand how chains work. You practice a row before you can recognize every stitch. Gradually, the movements that once required your complete attention begin to feel more natural.
Your first goal isn’t to make something beautiful. It’s to become comfortable holding the hook, managing the yarn, and creating loops.
That’s enough for day one.
What You Actually Need to Start Crocheting
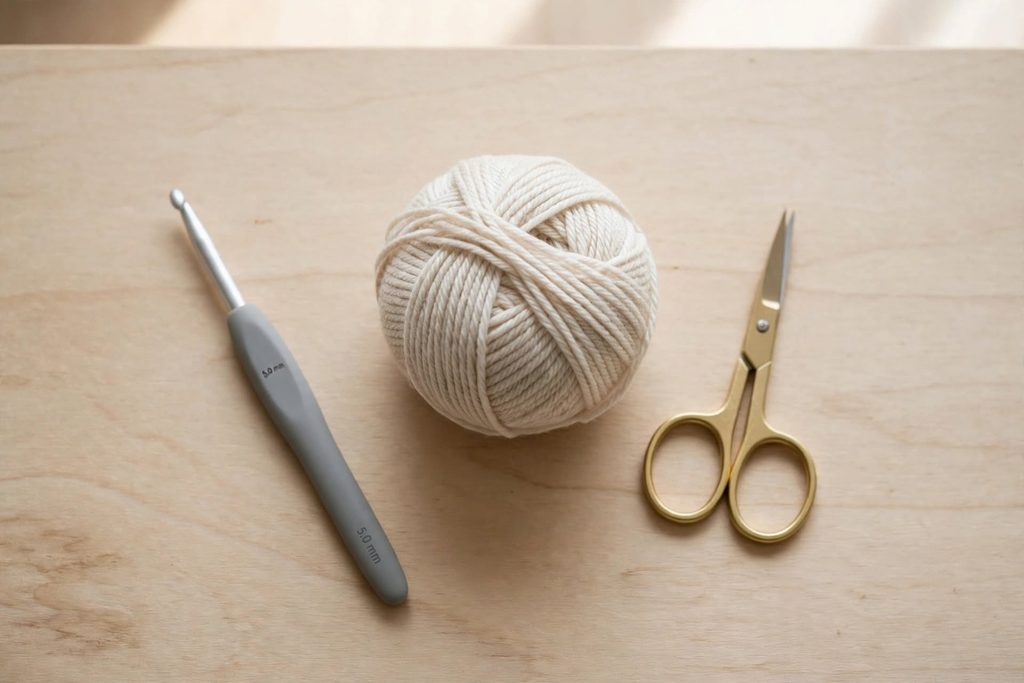
Here’s the good news: you can begin with two basic supplies.
- One crochet hook. A 5 mm hook is a reasonable starting point for many medium-weight yarns. Check the yarn label for the recommended hook size.
- One ball of smooth, light-colored yarn. Medium-weight yarn is often easier to handle than very thin yarn. A pale or neutral color can make individual stitches easier to see.
Choose yarn that isn’t too fuzzy or slippery. For your first practice session, avoid complicated novelty yarns, tiny hooks, and very dark colors that hide the stitches.
You can add stitch markers, row counters, ergonomic hooks, and project bags later. They’re useful, but none is essential for learning the basics.
Think of them as the kitchen gadgets you can buy after you’ve learned to make breakfast.
Your first shopping list is short: one hook, one ball of yarn, and a little patience.
Before Your First Stitch: Learn to Hold the Hook and Yarn
There isn’t one perfect way to hold a crochet hook. Some people hold it like a pencil; others hold it like a knife. Both approaches can work.
Choose the grip that feels comfortable and allows you to move the hook without straining your hand.
Your other hand guides the yarn and helps control its tension. At first, this may feel surprisingly awkward. The yarn slips, your fingers get tangled, and the hook seems to have a mind of its own.
That’s normal.
Try these simple principles:
- Hold the hook firmly enough to control it, but don’t squeeze it.
- Let the yarn slide through your guiding fingers rather than pulling it tight.
- Keep your shoulders relaxed.
- Pause when your hand feels tired.
Tension is the amount of tightness in your yarn and stitches. If you pull too hard, the hook becomes difficult to insert into the stitches. If the yarn is too loose, your loops may become large and uneven.
You don’t need perfect tension at the beginning. You need tension that lets you work comfortably.
Think of the yarn as something you’re guiding, not wrestling.
Your First Crochet Lesson: Make a Chain
The chain stitch is one of the first skills most beginners learn. It creates a foundation for many projects and gives you a chance to practice controlling the hook and yarn.
Here’s how to begin.
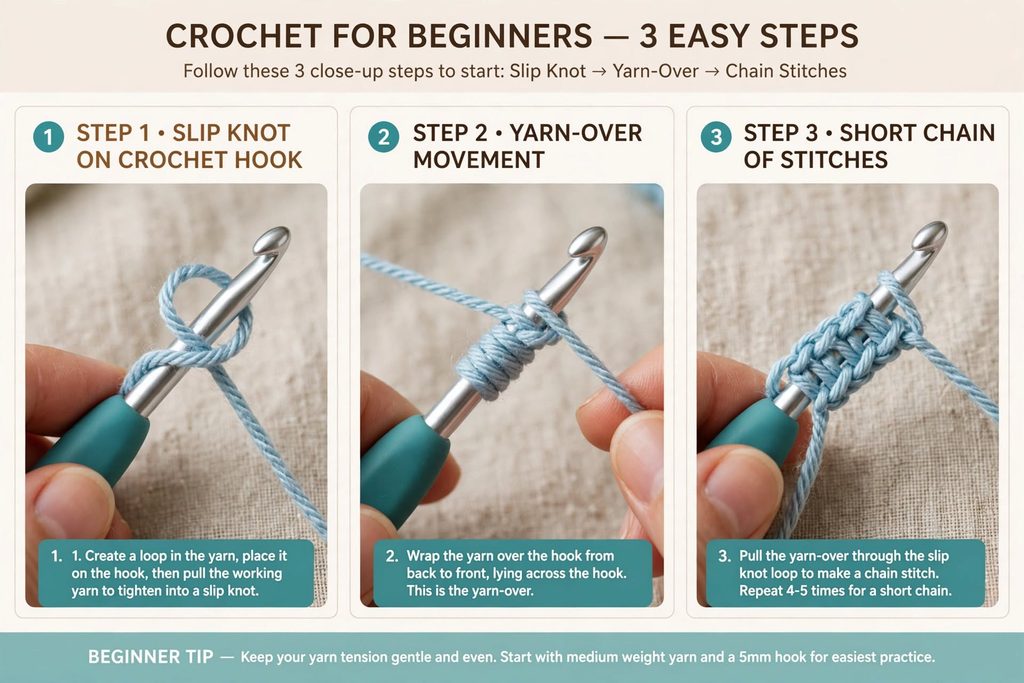
Step 1: Make a slip knot
Create a loop with your yarn, pull a section of the working yarn through it, and gently tighten the loop around your hook.
The loop should sit on the hook without being so tight that it cannot slide.
Step 2: Yarn over
Bring the working yarn over the hook. This movement is called a yarn over.
Step 3: Pull the yarn through the loop
Use the hook to catch the yarn and pull it through the loop already on your hook. You’ve made your first chain stitch.
Step 4: Repeat
Yarn over and pull through the loop again. Continue until you have a short chain.
Don’t rush. Your first chain may have some tiny stitches and some enormous ones. It may twist. You may lose track of where one stitch ends and another begins.
Keep practicing until the movement becomes more comfortable.
Beginner tip: If the chain is so tight that you can barely insert your hook, loosen your tension. If the loops are enormous and difficult to control, guide the yarn a little more consistently.
And if the first attempt looks like a string of tiny knots rather than a neat chain? Congratulations. You’ve begun.
Your First Real Stitch: Single Crochet
Once you can make a chain, you’re ready to practice the single crochet stitch.
In US crochet terminology, single crochet is abbreviated sc. It creates a relatively short, compact stitch that’s useful for dishcloths, amigurumi, and many other projects.
How to make a single crochet stitch
- Insert your hook into the second chain from the hook, unless your pattern specifies otherwise.
- Yarn over and pull the yarn through the chain. You should now have two loops on your hook.
- Yarn over again.
- Pull the yarn through both loops.
That’s one single crochet stitch.
Repeat the same steps across the chain.
When you reach the end, you’ll need to turn your work and make a turning chain before beginning the next row. For a basic single crochet practice swatch, one turning chain is commonly used, though pattern instructions can vary.
At first, focus on making the stitches rather than making the fabric look perfect.
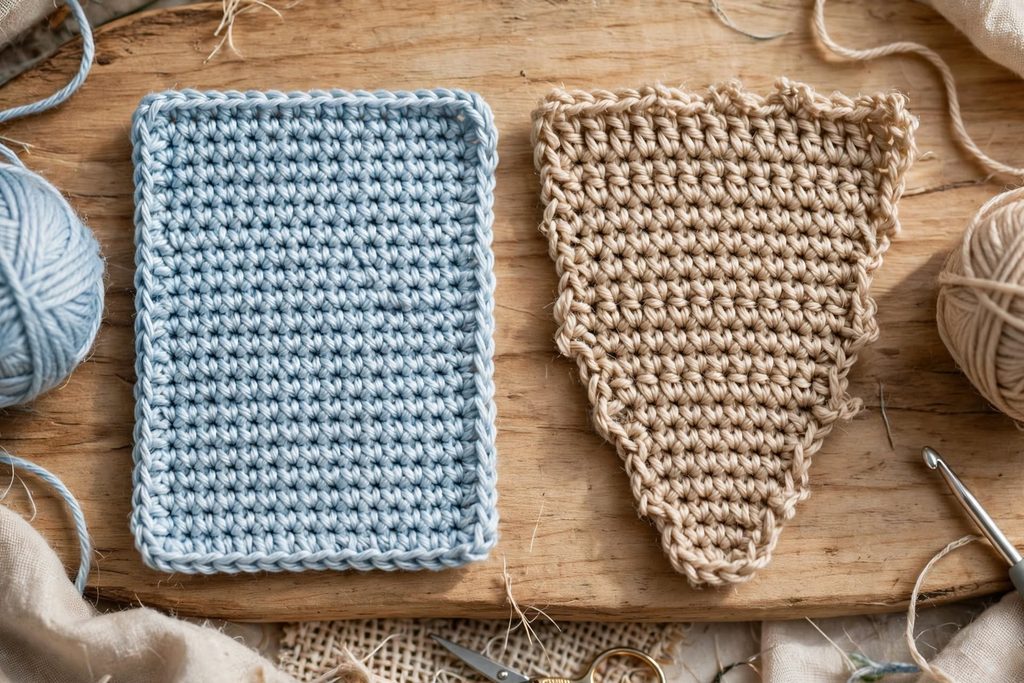
Why Is My Crochet Rectangle Getting Wider or Narrower?
This is one of the most common beginner frustrations.
If your rectangle gradually becomes wider, you may be accidentally making extra stitches. If it becomes narrower, you may be skipping stitches at the ends of rows.
Here’s how to improve your chances of keeping the edges straight:
- Count the stitches in each row.
- Pay special attention to the first and last stitch.
- Use a stitch marker to identify the first or last stitch if you keep losing track.
- Avoid pulling the yarn tighter just because a stitch looks uneven.
- If you notice a mistake, stop and examine the row instead of continuing and hoping it disappears.
You don’t need to fix every imperfect stitch immediately. But learning to count stitches early will make later projects much easier.
Five Basic Crochet Stitches Worth Learning
You don’t need to memorize every stitch in crochet. Start with a few common techniques and add others when a project calls for them.
| Stitch | Abbreviation (US terms) | What It’s Useful For |
|---|---|---|
| Chain | ch | Starting chains and spaces in patterns |
| Slip stitch | sl st | Joining rounds, edging, and moving across stitches |
| Single crochet | sc | Compact fabric, small projects, and amigurumi |
| Half double crochet | hdc | Medium-height stitches for blankets and scarves |
| Double crochet | dc | Taller stitches for blankets, shawls, and granny squares |
1. Chain Stitch (ch)
The foundation of many crochet projects. Yarn over, pull through, and repeat.
The chain looks a little like a braid. Practice making a short chain with loops that are reasonably consistent in size.
2. Slip Stitch (sl st)
Insert the hook into the indicated stitch, yarn over, and pull the yarn through both the stitch and the loop on your hook.
Slip stitches are short and useful for joining pieces, finishing edges, and moving across a row without adding much height.
3. Single Crochet (sc)
Insert the hook into a stitch, yarn over, and pull up a loop. Yarn over again and pull through both loops on the hook.
It’s a compact stitch that creates a relatively dense fabric.
4. Half Double Crochet (hdc)
Yarn over, insert the hook into the stitch, yarn over and pull up a loop. You should have three loops on the hook. Yarn over again and pull through all three loops.
The result is taller than a single crochet but shorter than a double crochet.
5. Double Crochet (dc)
Yarn over, insert the hook into the stitch, yarn over and pull up a loop. You should have three loops on the hook.
Yarn over and pull through two loops. Yarn over again and pull through the remaining two loops.
The taller stitch creates a more open fabric and helps projects grow more quickly.
A note about terminology: These abbreviations use US crochet terminology. In UK terminology, the same stitch names can refer to different stitches. If you’re following a pattern or video, check which terminology it uses before you begin.
Your First Practice Project: A Small Rectangle
Before you start a blanket, sweater, or complicated granny square, give yourself a smaller assignment.
Make a simple practice swatch.
- Make a chain of around 15–20 stitches.
- Work a row of single crochet stitches.
- Make the turning chain and turn your work.
- Continue working rows, counting your stitches each time.
- Stop when you have a small rectangle.
The exact size doesn’t matter. The purpose is to practice the movements and learn how to recognize your stitches.
Your first rectangle may not be rectangular. The sides might curve like a smile or frown. Some stitches may be tight; others may be loose. You may discover a mysterious hole at the edge that you can’t explain.
But to an experienced crocheter, that little piece of fabric says something important: your hands are learning.
Keep it if you like. Take a photo of it. Later, you may enjoy comparing it with something you make after a few weeks of practice.
And remember, you can unravel the swatch and reuse the yarn. There’s no rule that says your first attempt must become a permanent artifact.
Your First Granny Square: A Small Project With Big Possibilities
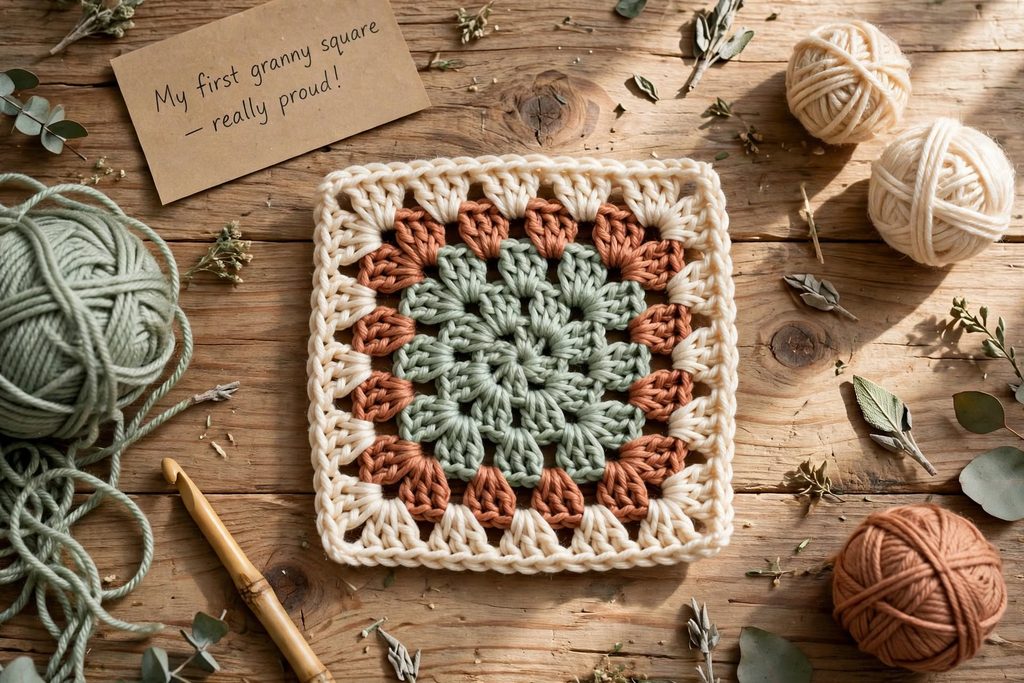
When you’re comfortable making chains and basic stitches, a granny square is a satisfying next project.
A traditional granny square is built in rounds. Groups of double crochet stitches form clusters, while chain spaces create corners and gaps between clusters. Slip stitches are often used to join rounds.
The repeating structure makes the square a good way to practice reading a pattern and recognizing familiar movements.
However, don’t worry if your first square curls, twists, or refuses to lie flat. The cause might be tension, stitch placement, or a missed instruction. Read the pattern carefully and compare your work with the expected shape after each round.
You don’t have to get it right on the first attempt.
Once you’ve made one square, you can experiment with different colors and make more. Several squares can eventually become a cushion cover, bag, blanket, or other project.
If you already have a granny-square pattern you love, you can use it as your first project once you’ve practiced the basic stitches. Choose a pattern that clearly explains the steps and includes photos or diagrams.
Crochet as a Way to Slow Down
The finished object is part of the pleasure of crochet, but it isn’t the only part.
There’s the small rhythm of the hook moving through the yarn. The texture beneath your fingers. The quiet satisfaction of finishing a row that looked impossible twenty minutes earlier.
For some people, repetitive handwork offers a welcome break from screens and daily distractions. It gives the hands something to do and the mind something simple to follow.
You may find it calming. You may find it frustrating at first. You may alternate between both feelings in the same evening.
That’s all right.
You don’t have to turn crochet into a wellness routine, a productivity project, or another skill you must optimize. Sometimes it’s enough to sit down, work a few stitches, and enjoy making something with your hands.
If your stitches become tangled, pause. If your hands feel tired, take a break. If you find yourself enjoying the repetition, let the moment last.
The point isn’t to force yourself into a state of perfect calm. It’s to discover whether this small, tactile craft brings something enjoyable into your day.
A Flexible 30-Day Crochet Roadmap
You don’t need to follow a strict schedule. Some people learn the basics in a few evenings; others need more time to feel comfortable. Use this roadmap as a guide, not a deadline.
Week 1: Get Comfortable With the Hook
Practice making a slip knot, holding the hook, and creating chains. Then begin single crochet rows.
Your goal: Become more familiar with the movements, not produce a perfect rectangle.
Week 2: Practice Keeping Your Edges Straight
Make a small swatch with repeated rows of single crochet. Count the stitches in each row and use stitch markers if necessary.
Your goal: Learn to recognize stitches and understand why the edges sometimes change shape.
Week 3: Try a New Stitch or a Small Project
Learn half double crochet or double crochet. If you’re ready, try a simple coaster or a beginner-friendly granny square pattern.
Your goal: Apply the basics to something small enough to finish without feeling overwhelmed.
Week 4: Choose a Project You Actually Want to Make
You might continue with granny squares, make a small dishcloth, or begin a simple scarf. Choose something that interests you and matches your current skills.
Your goal: Experience the satisfaction of completing a project, even if it has a few imperfections.
After the First Month: Keep Following Your Curiosity
Try a new stitch, experiment with color, or make a small gift for someone you care about. If a project becomes frustrating, put it aside and return to it later.
Progress isn’t measured by how quickly you finish a blanket. It’s measured by what you learn and what you enjoy along the way.
Common Beginner Crochet Mistakes—and How to Handle Them
Almost everyone encounters a few familiar problems when learning to crochet. Recognizing them can save you time and frustration.
My chain is too tight.
Try making each loop a little larger and allowing the yarn to move more freely through your guiding fingers. Avoid pulling each stitch tightly against the hook.
My work keeps getting wider.
Count the stitches in every row and check whether you’re accidentally working into a space that isn’t a stitch. Pay particular attention to the edges.
My work keeps getting narrower.
You may be missing the first or last stitch of a row. Marking the edge stitches can help you see where the row begins and ends.
I can’t tell where to insert my hook.
Work with smooth, light-colored yarn and good lighting. Look at the top of the stitches for the small V-shaped loops, and use a close-up tutorial or diagram if you’re unsure.
My stitches look uneven.
This is common while you’re learning to manage the yarn. Continue practicing at a comfortable pace. Consistency often improves with repetition.
I made a mistake several rows ago.
You can sometimes unravel back to the mistake and redo the stitches. If the error is minor and the piece still works, you may decide to leave it. Learning when to correct a mistake is part of learning the craft.
Your first project is a practice ground, not an examination.
Your First Crochet Project Doesn’t Have to Be a Masterpiece
You may begin with a crooked rectangle and end up with a scarf you wear every winter. You may start with a granny square and eventually make a blanket from dozens of them. Or you may discover that you love learning new stitches more than finishing large projects.
You don’t have to know which kind of crocheter you’ll become.
Start with one hook and one ball of yarn. Practice a chain. Learn a single crochet. Count your stitches. Let yourself make mistakes without treating every uneven loop as evidence that you aren’t good at this.
And when you finish that first little piece of fabric, take a moment to appreciate it.
Not because it’s perfect, but because you made it.
Your First Crochet Session: A Simple Checklist
Before you put your yarn away, see if you can:
- Hold the hook in a way that feels comfortable.
- Make a slip knot.
- Create a short chain.
- Work a few single crochet stitches.
- Recognize when a stitch is too tight to work into easily.
- Count the stitches in a short row.
You don’t have to check every box in one sitting. If you can do only one or two today, that’s still progress.
The next time you pick up your hook, you’ll be starting with a little more familiarity than you had before.
May your chains be loose, your yarn be easy to work with, and your first imperfect rectangle remind you that every skilled crocheter once had a first row.
The hook doesn’t create a masterpiece in a single motion. It creates one loop, then another, and another.
That’s how the craft begins. And that’s how you begin, too.