I once spent twelve hours crocheting a bag I was certain would be my everyday companion. I chose the softest merino yarn in a color the shop assistant called “ocean mist.” I worked every stitch with the patience of a monk. When I finished, I held it up and watched it collapse into a shapeless puddle, like a deflated balloon. It could not stand upright. It could not hold a book without sagging. It looked less like a handbag and more like a sock that had given up on life.
That bag taught me the most expensive lesson in crochet accessories: softness is not a virtue when structure is the goal.
Before we begin, let me save you from the same mistake. Most crochet bag patterns focus on the decorative shell — the color, the texture, the pretty stitches — but almost ignore the architecture. And that is exactly why so many handmade bags end up in the back of a closet, squashed under shoes. The good news? A structured duffel bag with a firm base, textured body, and real hardware takes 10 to 15 hours, costs a fraction of a designer equivalent, and will outlast every store-bought tote you have ever owned. Below is the exact method — with real stitch counts, yardage, and the one structural trick that separates a bag you carry from a bag that carries itself.
3 Mistakes That Make a Crochet Bag Look Cheap
Before we pick up the hook, let us talk about what goes wrong. Because almost every failed crochet bag I have made — and I have made many — failed for one of these three reasons.
The Base Is an Afterthought
A bag without a firm base is not a bag. It is a sack. The moment you set it on a café table or an airport floor, it flops open like a tired animal. Your keys, wallet, and dignity spill out for everyone to see.
The fix: Crochet the base as a doubled oval — two layers of dense single crochet with a piece of plastic canvas or foam board sandwiched between them. This creates a floor that holds its shape without adding significant weight.
The Yarn Is Too Thin
A structured bag needs body. Fingering-weight yarn, no matter how beautiful, will never hold a duffel shape. It will sag, stretch, and eventually look like a grocery tote that has seen too many Saturdays.
The fix: Use cotton cord (3 to 5 mm diameter), t-shirt yarn, or macramé cord. These materials have inherent stiffness. They create walls that stand up even when the bag is empty.
The Hardware Is Missing
A crochet bag without metal hardware looks like a craft project. A crochet bag with a zipper, D-rings, and a leather label looks like it came from a boutique in Copenhagen. The difference is not skill. It is $15 worth of hardware and the courage to install it.
Materials You Need
-
Yarn: Cotton cord or t-shirt yarn, 5 to 7 mm diameter, approximately 500 to 600 meters for a medium-sized bag. For the bag in the photograph, a royal blue cotton cord was used to create that dense, woven texture.
-
Hook: 6 mm (US J) or 8 mm (US L), depending on cord thickness. Use a hook that creates tight, firm stitches.
-
Base insert: Plastic canvas, foam board, or a pre-cut bag base (available in craft stores).
-
Zipper: 30 to 40 cm metal zipper in a matching or contrasting color.
-
D-rings and swivel clasps: 2 to 4 pieces for the shoulder strap.
-
Leather or faux leather label: Optional, but it multiplies the perceived value significantly.
-
Lining fabric: Canvas, cotton duck, or faux suede, approximately 0.5 meters.
-
Sewing needle and strong thread: For attaching the lining and zipper.
Gauge: Not critical for bags, but your stitches should be tight enough that the fabric does not gape. If you can see daylight through the walls, go down a hook size.
The Base: Where Structure Begins
The base is the foundation of everything. Get this wrong, and the bag will always disappoint you.
Step 1: The Oval
With your cord and hook, chain 21.
Round 1: Work 2 single crochet in the second chain from the hook. Single crochet in each chain across to the last chain. Work 5 single crochet in the last chain. Rotate to work along the opposite side of the chain. Single crochet in each stitch across to the last stitch. Work 3 single crochet in the last stitch. Place a stitch marker. Do not join — work in continuous spirals.
Round 2: Work 2 single crochet in each of the next 2 stitches, single crochet in each stitch across to the corner, work 2 single crochet in each of the next 5 stitches, single crochet across, work 2 single crochet in each of the next 3 stitches.
Round 3: Single crochet in each stitch around, working 2 single crochet in the center stitch of each curved end.
Continue until the base measures approximately 30 cm long and 15 cm wide (12 by 6 inches). This is the standard size for a medium duffel.
Step 2: The Doubled Floor
Cut a second identical oval. Place your plastic canvas or foam insert between the two crocheted ovals. Whip-stitch the edges together. This sandwich is now the floor of your bag — firm, flat, and invisible from the outside.
The Body: Texture That Hides Imperfection
The body of a structured duffel should look intentional from every angle. The best stitch for this is one that creates a woven, basket-like surface.
The Waistcoat Stitch (Recommended)
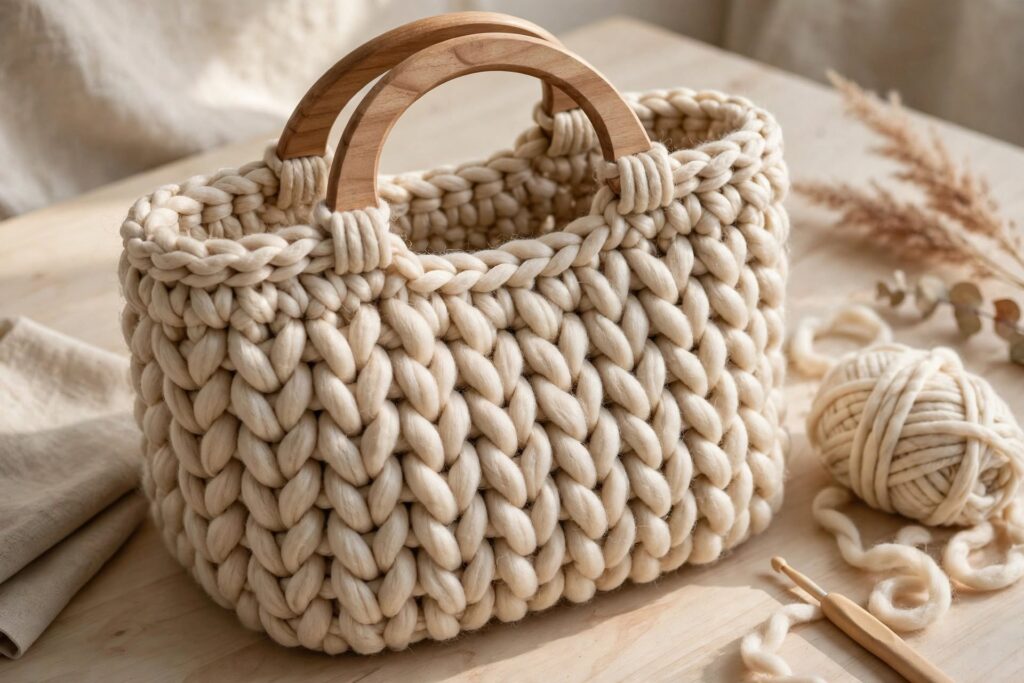
The waistcoat stitch — single crochet worked into the center of the stitch below, rather than the top loops — creates a dense, knit-like fabric with vertical ribs. It is thick, structured, and looks remarkably like woven leather when worked in cotton cord.
Round 1: Attach yarn at the edge of the base. Work 1 single crochet in each stitch around the entire perimeter of the oval. You should have approximately 70 to 80 stitches.
Rounds 2 to 30: Work waistcoat stitch in continuous rounds. Insert your hook into the center of the stitch below (between the V), not under the top two loops. This creates the vertical rib. Continue until the body measures 25 to 30 cm (10 to 12 inches) from the base.
The front pocket: Work a separate rectangle in waistcoat stitch, approximately 15 cm wide and 12 cm tall. Sew it to the front of the bag using a whip stitch, leaving the top open. This pocket is both functional and architectural — it breaks up the wall of texture and adds visual interest.
Handles, Straps, and the Architecture of Carrying
A bag is only as good as its handles. Thin, floppy straps dig into your shoulder and make the entire piece feel temporary.
Top handles: Work an I-cord (knit-like tube) in single crochet through the back loop only, approximately 30 cm long and 2 cm thick. Attach them to the bag body with metal D-rings or by sewing directly through the top edge with strong thread. Space them 10 cm apart on the top edge.
Shoulder strap: Work a longer I-cord or flat strap, approximately 100 to 120 cm. Attach swivel clasps to each end so the strap can be removed or adjusted. The metal clasp is the detail that makes people ask where you bought the bag.
The attachment rule: Never attach straps only to the crochet fabric. Always sew through the lining layer as well, or use metal D-rings anchored with multiple layers. A strap that rips out after two weeks is a tragedy easily avoided.
Hardware: The $15 Upgrade That Changes Everything
This is where handmade becomes boutique.
The zipper: Pin a 30 to 40 cm metal zipper to the top opening of the bag, right sides together. Hand-sew or machine-sew it in place using a zipper foot. A zipper transforms a tote into a duffel. It signals that the bag is meant for travel, not just groceries.
D-rings: Sew metal D-rings to the sides of the bag where the shoulder strap attaches. The metal against the matte cotton cord creates the contrast that luxury brands charge for.
Purse feet: Add four metal purse feet to the bottom corners of the base. They lift the bag slightly off dirty surfaces and add a professional finish that most homemade bags skip.
The label: Sew a small leather or faux leather label to the front pocket. Emboss it with your initials. It costs next to nothing and can significantly increase the perceived value.
Sizing and Yardage
Here is the honest breakdown for planning your project:
| Size |
Base Dimensions |
Body Height |
Yardage |
Time |
| Small |
25 × 12 cm |
20 cm |
~350 m |
8–10 hrs |
| Medium |
30 × 15 cm |
25–30 cm |
~500–600 m |
12–15 hrs |
| Large |
35 × 18 cm |
30–35 cm |
~700–900 m |
18–22 hrs |
Pro tip: Buy 10% more yarn than you think you need. Running out of a specific dye lot on a bag project is a special kind of heartbreak.
The Lining: The Invisible Luxury
A bag without lining is a bag without a future. The lining protects the crochet from stretching, hides the base insert, and provides interior pockets for organization.
Cut your lining fabric to match the interior dimensions of the bag, plus 1 cm seam allowance. Sew a simple rectangular bag with one or two interior slip pockets. Insert it into the crochet shell, fold the top edge over the zipper tape, and hand-sew in place.
The pocket trick: Add a small zippered pocket inside the lining for keys. It prevents the daily archaeological dig at the bottom of the bag.
FAQ
Can I wash a structured crochet bag?
Spot clean only. Cotton cord can handle damp cloth and mild soap, but submerging the bag may warp the base insert and rust the hardware.
How long does it take to crochet a duffel bag?
A medium-sized structured duffel takes 12 to 15 hours, including finishing and hardware installation.
What yarn is best for structured bags?
Cotton cord (3 to 5 mm), t-shirt yarn, or macramé rope. These fibers hold their shape and create firm walls.
Do I need a lining?
Yes. The lining prevents stretching, hides construction details, and adds interior pockets. It is the difference between a craft project and a usable accessory.
Can I add a crossbody strap?
Absolutely. Use swivel clasps and an adjustable metal slider on a long I-cord or woven strap