There is a specific kind of person who can walk to the grocery store and make it look like Paris Fashion Week.
It has nothing to do with the boots. Nothing to do with the sunglasses. It’s the poncho — that impossible garment somewhere between a blanket and a decision — swinging from their shoulders like the sidewalk personally requested an encore.
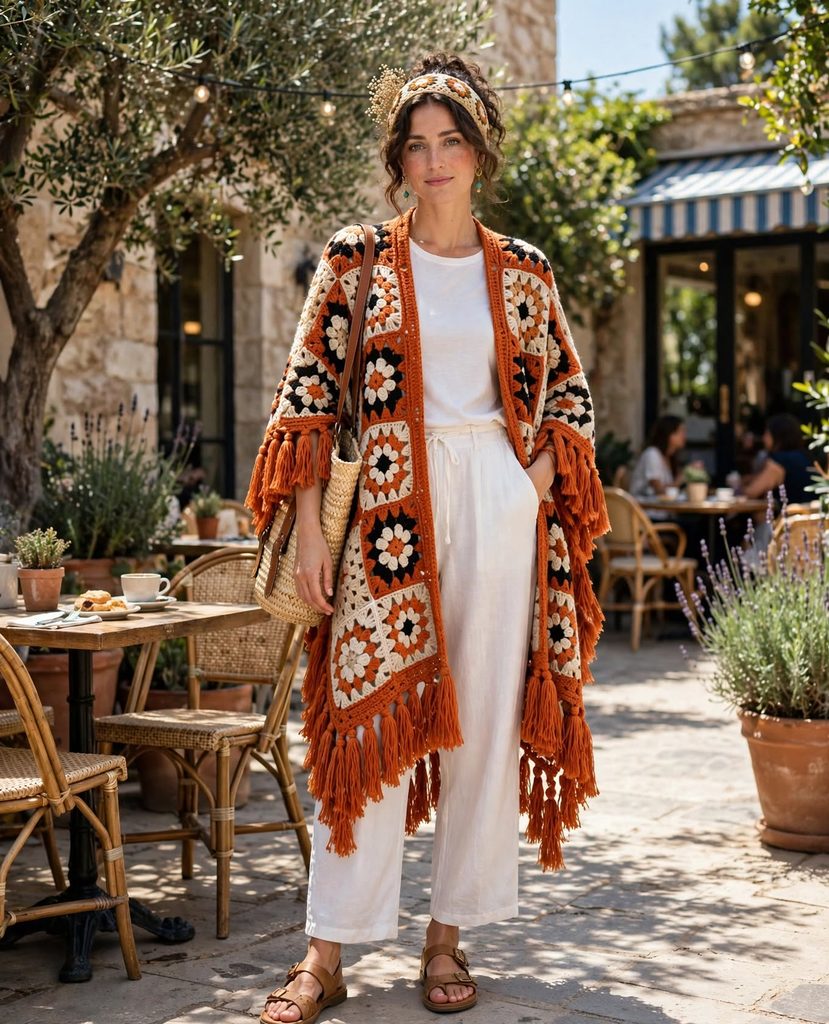
Here’s the plot twist nobody expects: that poncho is granny squares. The same humble squares your grandmother churned out by the armful have a secret second life as outerwear with main-character energy. And here’s the better plot twist: if you can crochet one granny square, you already own the hardest skill in this project. The poncho is not a harder project. It’s just more square.
Quick Facts (Before You Fall in Love)
Skill Level: Advanced beginner — comfortable with granny squares, joining, and basic finishing
Yarn: Worsted weight, roughly 1000–1200 m total, in 4–6 colors (estimate — see note below)
Hook: 5.0 mm (US H/8), or the size that gives you the gauge below
Time: A few weeks of evenings — this is a marathon of small sprints
You Make: Two panels of joined granny squares, sewn at the shoulders
Best Season: Autumn and spring — poncho season is a state of mind
First, the Honest Truth About Sizing
A poncho has two measurements that matter most: how long it hangs, and how wide it sits on your shoulders. Well — two and a half. The third is the neck opening: it has to pass your head and rest comfortably, and where you place the shoulder seams decides how the whole thing drapes. Three practical numbers to decide before you start:
Panel width (across the shoulders): 4 squares ≈ 45–52 cm — a comfortable drape for most adults. Go 5 wide if you like drama.
Panel length: 5 squares ≈ 55–65 cm for a classic hip-length poncho. Add squares for more swish.
Neck opening: aim for roughly 22–26 cm — wide enough to slip over your head without a fight.
And one honest disclaimer, because you deserve it: all the numbers in this article — square size, yardage, hours — are working estimates, not guaranteed finished specs. They assume a square of about 11–13 cm. Your yarn, tension, and joining method will shift them, so make and measure one complete square before committing to all 40.
You Will Need
- Worsted weight yarn in 4–6 colors — this is the perfect excuse for a stash-busting spree
- 5.0 mm crochet hook
- Tapestry needle for weaving ends (there will be many ends; embrace it as a meditative practice)
- Scissors
- Optional: a favorite sweater to drape over your squares as a size reference
The Squares: A Familiar Friend, Repeated — Reliable Working Pattern
You’ll use the classic granny square — 4 rounds. This is the only square pattern you need. US terms.
Round 1
Magic ring, ch 3 (counts as first dc), 2 dc into ring, ch 2, *(3 dc into ring, ch 2) three times. Join with sl st to top of beginning ch-3. (4 clusters, 4 corner spaces)
Round 2
Sl st into next ch-2 space, ch 3, (2 dc, ch 2, 3 dc) in same space, ch 1, *(3 dc, ch 2, 3 dc) in next ch-2 space, ch 1; repeat from * around. Join.
Round 3
Sl st into next ch-2 space, ch 3, (2 dc, ch 2, 3 dc) in same space, ch 1, *3 dc in next ch-1 space, ch 1, (3 dc, ch 2, 3 dc) in next ch-2 space, ch 1; repeat from * around. Join.
Round 4
Sl st into next ch-2 space, ch 3, (2 dc, ch 2, 3 dc) in same space, ch 1, *3 dc in next ch-1 space, ch 1, 3 dc in next ch-1 space, ch 1, (3 dc, ch 2, 3 dc) in next ch-2 space, ch 1; repeat from * around. Join. Fasten off, leave a 15 cm tail.
Size: After 4 rounds the square should measure 11–13 cm. If it is smaller, try a 5.5 mm hook. If larger, try a 4.5 mm hook. Make one test square and measure it before making all 40.
For a 4×5 panel, that’s 20 squares per panel, 40 total. Before you faint: each square is 30–40 minutes once the rhythm sets in. That lands somewhere around 20–25 hours of crocheting — which sounds enormous until you realize it happens in lovely 40-minute installments in front of the television.
One rule that saves sanity: weave in the ends as you finish each square. Future you, holding square #37 with six dangling tails, will write you a poem of gratitude.
The Layout: Where the Runway Decisions Happen
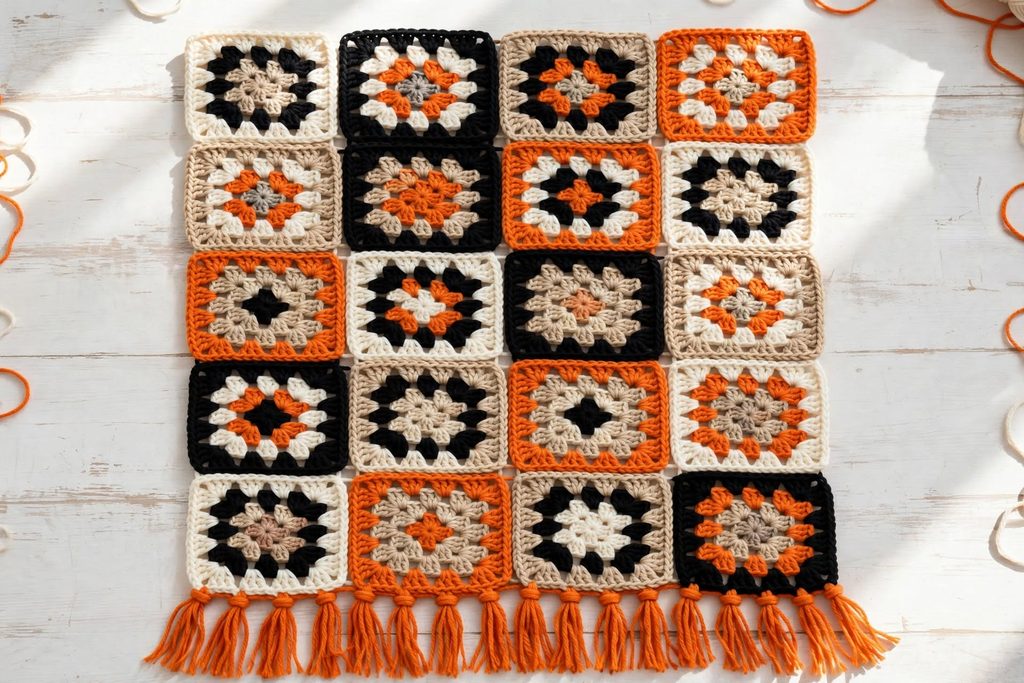
Before joining anything, lay your squares on the floor and play. This five-minute game decides whether your poncho reads “handmade heirloom” or “confetti explosion”:
The Ombré Column: grade your colors vertically, dark shoulders fading to bright hem. The most “designer” option with the least effort.
Checkerboard: alternate two main colors like a chessboard — graphic, bold, endlessly satisfying.
Controlled Chaos: random colors, but with one rule (for example: no two identical squares touch). Structure wearing a disguise.
The Pop: mostly calm neutrals, with one shocking color appearing in a diagonal line. People will ask where you bought it.
Construction: Two Panels, Two Shoulder Seams, One Neck Hole
This is the whole assembly — simpler than it sounds, but follow the order:
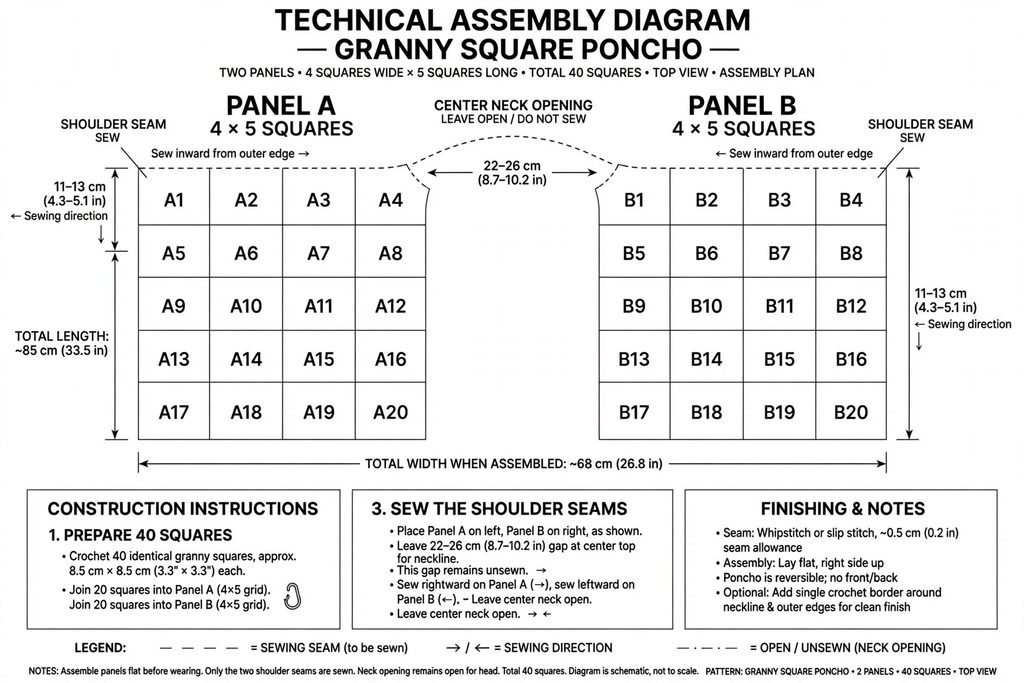
Join your squares into two identical panels — 4 squares wide, 5 squares long each. Use the flat slip-stitch join for a neat ridge, or whipstitch for an invisible seam. One panel is the FRONT, one is the BACK.
Lay the panels right sides together, top edges aligned — the edge that will sit on your shoulders.
Sew the shoulder seams: stitch along the top edge from each outer corner inward for about 1 square (11–13 cm). Those two seams carry the whole poncho.
Leave the center 2 squares (≈ 22–26 cm) unsewn. That gap is your neck opening.
Turn it right side out and try it on. There it is. A poncho.
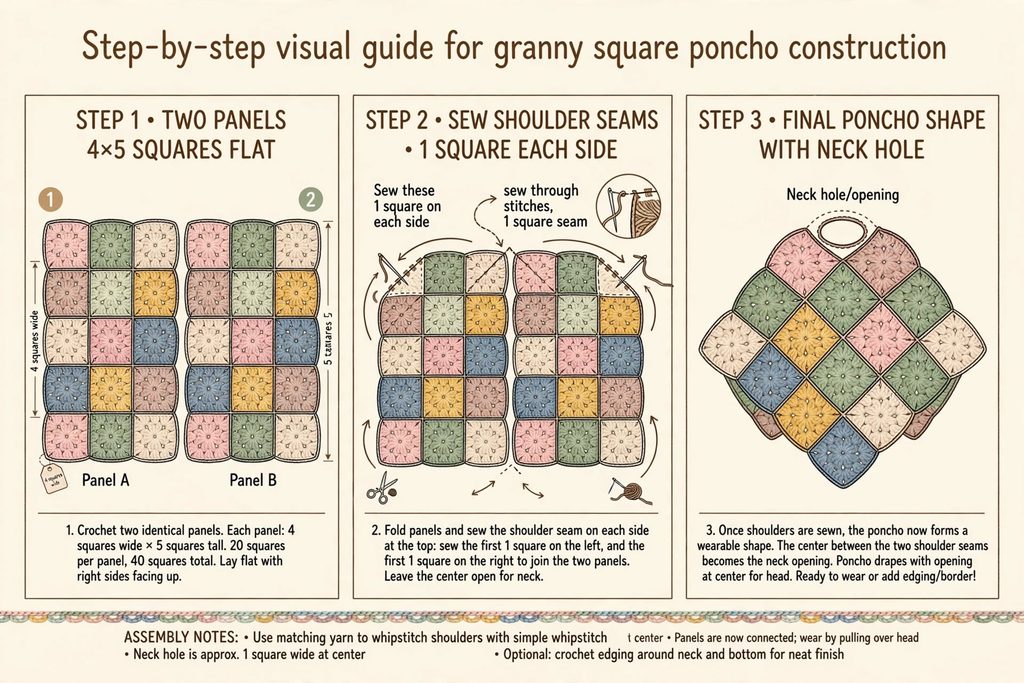
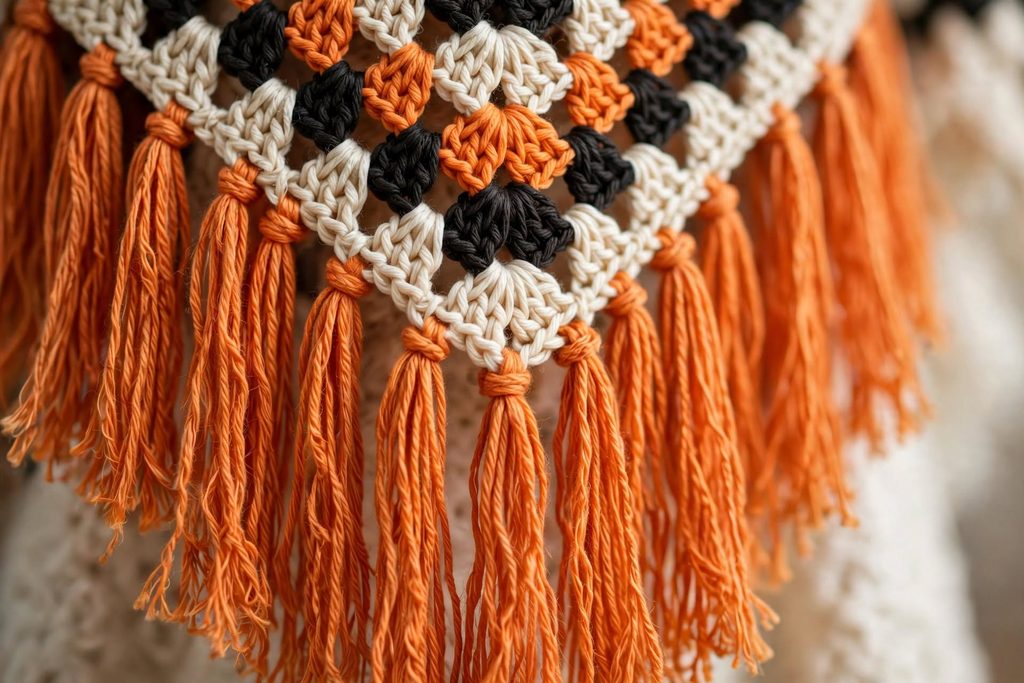
Optional finish: crochet one round of single crochet around the neck opening to stabilize it, and around the hem and side openings if you’d like a firmer edge. Optional — but it helps the poncho hold its shape wear after wear.
The formula in one line: 1 square sewn + 2 squares open + 1 square sewn = a 4-square-wide shoulder. Four squares of ∼11–13 cm each give you a panel of ∼45–52 cm.
The Styling (Where Sidewalks Come In)
A granny square poncho asks for simple company:
Bottom half: straight-leg jeans, black trousers, or a plain midi skirt. Let the poncho be the sentence; everything else is punctuation.
Underneath: a fitted long-sleeve top or thin turtleneck. The poncho is voluminous, so slim layers underneath keep the silhouette intentional.
Feet: boots. Any boots. Boots and ponchos are in a long-term committed relationship.
The finishing move: one solid-color accessory — a hat, a bag, a bold lip. One. The poncho is already the party.
Troubleshooting, Honestly
My panels won’t lie flat. Your squares are slightly different sizes — it happens to everyone. Dampen the finished panels, pin them to size, and let them dry flat; small differences mostly disappear with blocking.
The neck gapes. Add a round of single crochet decreasing a few stitches at the front and back of the neck, or thread a ribbon through the neck round for an adjustable drawstring.
The hem curls. Add a round of crab stitch (reverse single crochet) around the hem. It’s the crochet equivalent of hemming with attitude.
Care, Because You’ll Wear It Constantly
The golden rule: follow the yarn label, not the general internet. Fibers disagree with each other — some wool blends insist on hand washing or a gentle wool cycle, some acrylics tolerate machines happily. Check your label, wash accordingly, and unless the manufacturer says otherwise, dry the poncho flat — hanging a wet, heavy garment is how shoulder points and sad, stretched hems are born.
Between washes, a quick steam refresh (hover, don’t press) brings the squares back to crisp life.
Why This Project Changes You
Forty squares in, something shifts. You stop reading patterns and start reading fabric. You hold up a square and know before counting whether it has the right number of clusters. Your hands know the corner rhythm. And one October evening, you walk to the store in the thing you made, and a stranger says “I love your poncho,” and you get to say the four best words in the craft:
“Thank you. I made it.”
That’s the runway. It was never about the sidewalk.
YOU MIGHT ALSO LOVE:
- The Vest That Rewired My Brain: A Love Letter to Crochet Geometry
- Easy Granny Square Bag: Beginner Crochet Pattern
- Plush Granny Square Crochet Pattern: A Beginner’s Guide to Textured Floral Motifs
- Granny Patchwork Bucket Bag Tote You’ll Use Every Day
- The Crochet Market Bag That Makes Grocery Shopping Feel Like a Ritual