Disclosure: This post contains affiliate links. If you buy something through one of them, I may earn a small commission at no extra cost to you. Thank you for supporting Wool & Hook!
What if the perfect summer bag isn’t hanging in a store, but waiting at the end of your crochet hook?
Last summer I looked for a beach tote that felt like something. Most ready-made options were either too expensive or completely lifeless. Then I remembered my grandmother’s yarn basket — dense, textured, full of quiet character.
A few evenings later, this bag began to take shape.
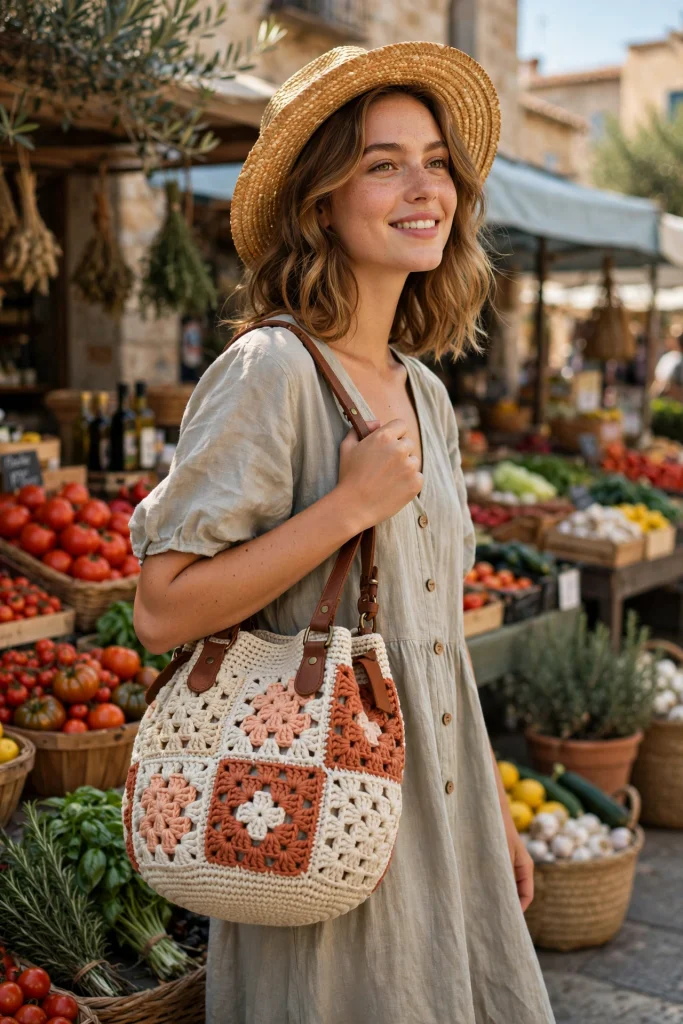
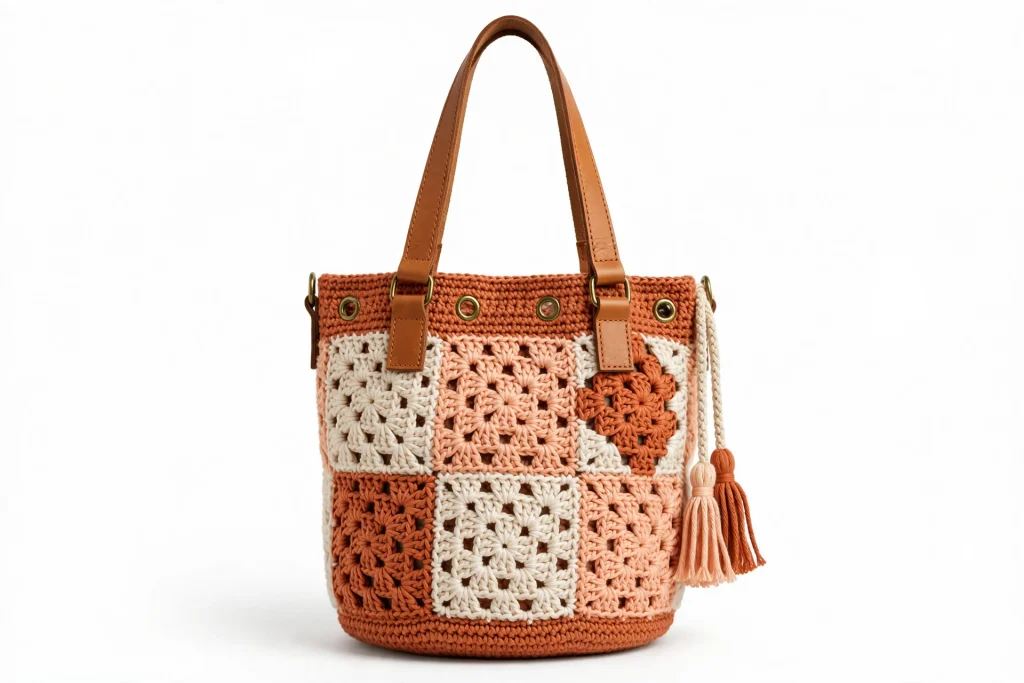
It has a stable round base, a body of granny clusters that shift through cream, peach and terracotta, and handles ready for market runs or sandy walks. The finished bag is practical, but it has a little more personality than something picked up on the way to the beach.
When you carry it, you carry something made by hand.
Quick Facts
| Detail | Answer |
|---|---|
| Skill Level | Easy – Advanced Beginner |
| Yarn | Worsted-weight cotton or cotton blend |
| Hook | 5.0 mm (US H/8) |
| Time | Allow approximately 8–12 hours |
| Finished Size | Approximately 25 cm wide × 28–30 cm tall |
| Best For | Summer markets, beach days, everyday carry |
Time, yarn usage and finished dimensions will vary with your yarn, tension and handle choice.
What You’ll Need
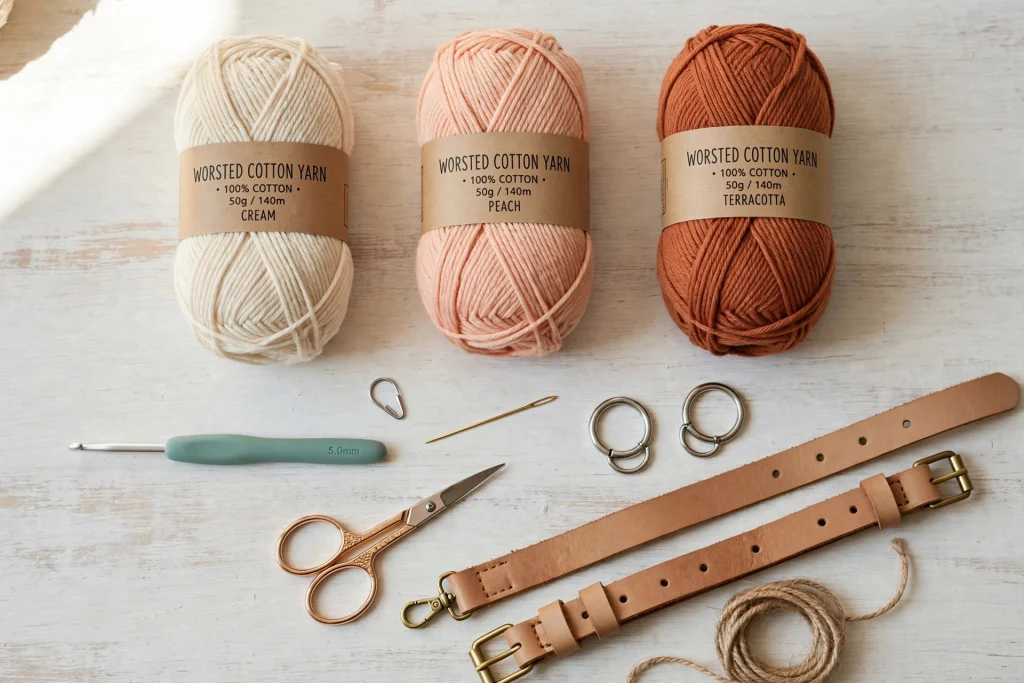
- Worsted-weight cotton yarn in 3 colors, approximately 450–550 m total:
- Color A: Cream
- Color B: Peach
- Color C: Terracotta
- 5.0 mm crochet hook
- Stitch marker
- Tapestry needle
- Scissors
- Optional: leather handles and D-rings, or crocheted handles
- Optional: fabric lining
Cotton is a good choice for a summer bag because it gives the stitches definition and creates a sturdy fabric. A cotton blend can work, too, but check how much stretch it has before you begin.
Abbreviations (US Terms)
- ch – chain
- sl st – slip stitch
- sc – single crochet
- hdc – half double crochet
- dc – double crochet
- sp – space
- rep – repeat
- st(s) – stitch(es)
- hdc2tog – half double crochet two together
Before You Begin
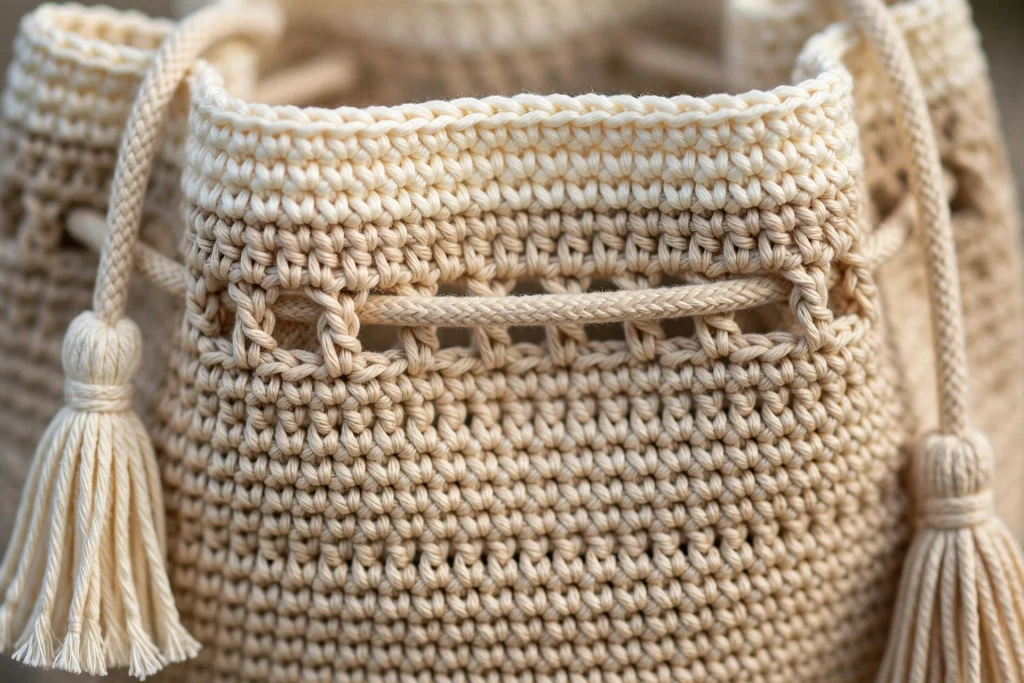
This bag is worked from the bottom up. First, you’ll crochet a flat circular base. Then you’ll create a row of chain spaces and work the granny-stitch body in joined rounds. The top edge includes small eyelets for a drawstring.
The turning chains do not count as stitches unless stated otherwise.
For the body, each granny cluster consists of 3 dc worked into one chain space. At the end of each round, join with a slip stitch as instructed. This keeps the color changes and round starts easier to track.
The Pattern
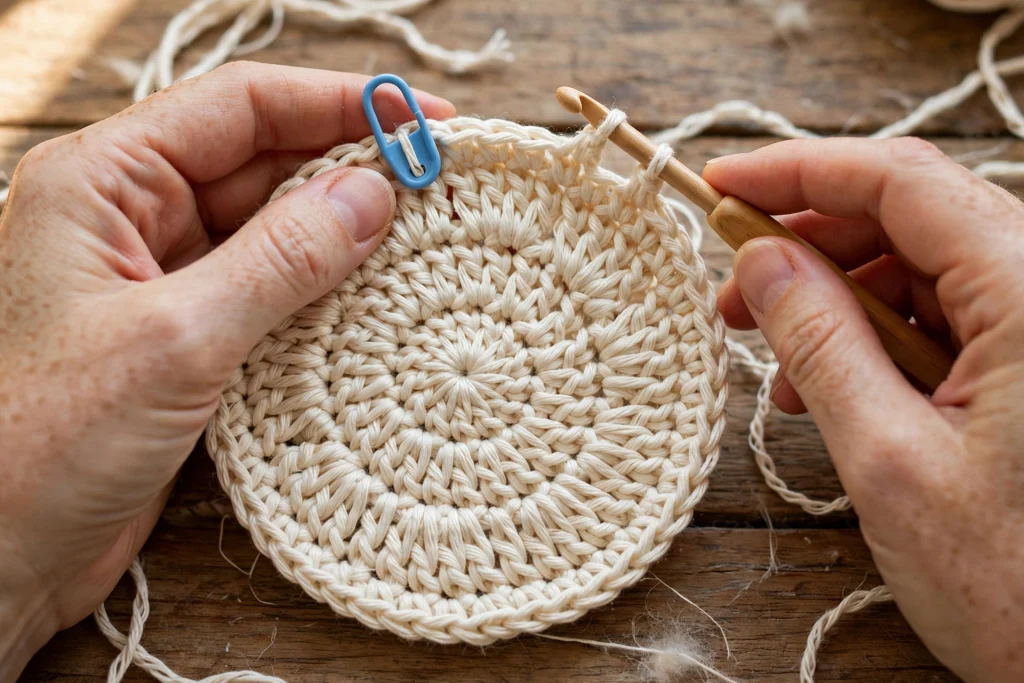
1. Circular Base
Work in joined rounds.
Round 1: Make a magic ring. Ch 2 (does not count as a stitch), then work 8 hdc into the ring. Pull the tail tight. Join with a sl st to the first hdc. (8 sts)
Round 2: Ch 2, 2 hdc in each st around. Join. (16 sts)
Round 3: Ch 2, *2 hdc in next st, hdc in next st; rep from * around. Join. (24 sts)
Round 4: Ch 2, *2 hdc in next st, hdc in next 2 sts; rep from * around. Join. (32 sts)
Round 5: Ch 2, *2 hdc in next st, hdc in next 3 sts; rep from * around. Join. (40 sts)
Round 6: Ch 2, *2 hdc in next st, hdc in next 4 sts; rep from * around. Join. (48 sts)
Round 7: Ch 2, *2 hdc in next st, hdc in next 5 sts; rep from * around. Join. (56 sts)
Round 8: Ch 2, *2 hdc in next st, hdc in next 6 sts; rep from * around. Join. (64 sts)
Round 9: Ch 2, hdc in each st around, working 4 hdc2tog evenly spaced around the round. Join. (60 sts)
Your base should lie flat. Its finished diameter will depend on your yarn and tension; aim for approximately 21–23 cm.
2. Setup Round for the Granny Stitch
Switch to Color A (Cream).
Setup Round: Ch 1. *Sc in next st, ch 2, skip next 3 sts; rep from * around. Join with a sl st to the first sc. (15 sc and 15 ch-2 spaces)
You now have 15 spaces around the base. These spaces will hold the granny clusters that form the body of the bag.
3. Granny-Stitch Body
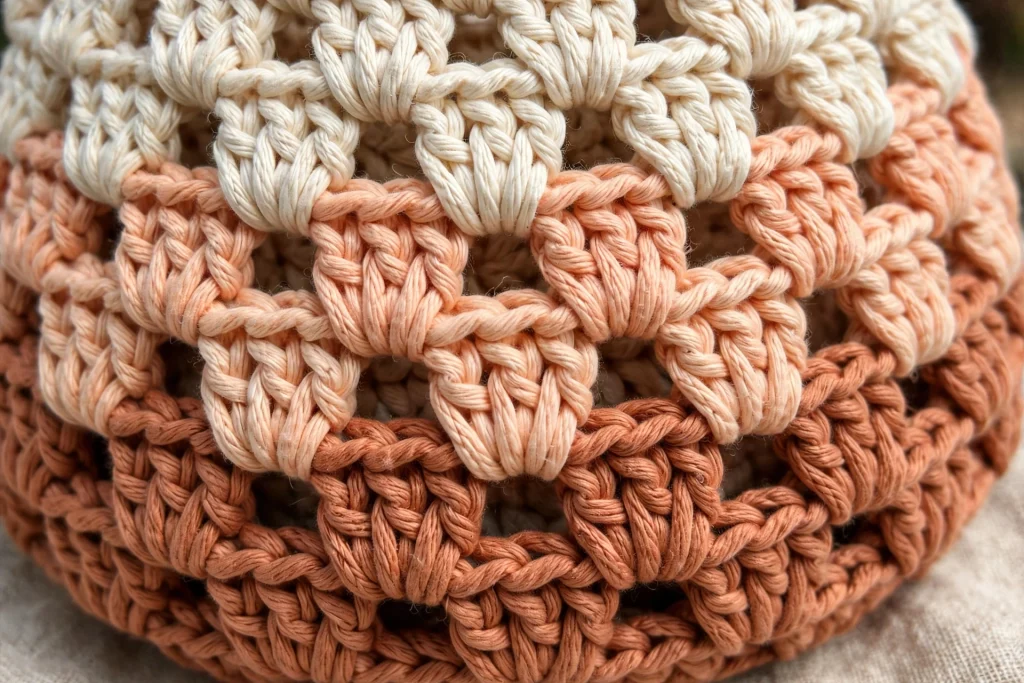
The body is worked in joined rounds. Each cluster consists of 3 dc worked into the chain space between clusters from the previous round.
Round 1 (Color B – Peach): Sl st into the first ch-2 space. Ch 3 (counts as the first dc), then work 2 dc into the same space. *Work 3 dc into the next ch-2 space; rep from * around. Join with a sl st to the top of the beginning ch-3. (15 clusters)
Round 2 (Color B – Peach): Sl st into the first space between clusters. Ch 3 (counts as the first dc), then work 2 dc into the same space. *Work 3 dc into the next space between clusters; rep from * around. Join with a sl st to the top of the beginning ch-3.
Rounds 3–5 (Color B – Peach): Repeat Round 2.
Rounds 6–8 (Color C – Terracotta): Join Color C and repeat Round 2 for each round.
Rounds 9–11 (Color A – Cream): Join Color A and repeat Round 2 for each round.
Rounds 12–14 (Color B – Peach): Join Color B and repeat Round 2 for each round.
Rounds 15–16 (Color C – Terracotta): Join Color C and repeat Round 2 for each round.
At the end of Round 16, you should have 15 granny clusters around the bag. The body should begin to rise from the circular base, creating the familiar bucket shape.
4. Top Edge and Drawstring Eyelets
Switch to Color A (Cream).
Round 17: Ch 1. Work 1 sc into each dc and 1 sc into each space between clusters around. Join with a sl st to the first sc. (60 sts)
Round 18: Ch 1. *Sc in next 5 sts, ch 2, skip next st; rep from * around. Join with a sl st to the first sc. (50 sc and 10 ch-2 spaces)
These small openings will hold the drawstring. If your stitches are particularly tight, check that the cord can pass through the eyelets before moving on.
Round 19: Ch 1. Work 1 sc in each sc and 1 sc into each ch-2 space around. Join. (60 sts)
Round 20: Ch 1. Sc in each st around. Join with a sl st to the first sc. Fasten off and weave in the ends.
5. Handles (Make 2)
Crocheted Handles
Ch 8.
Row 1: Sc in the 2nd ch from the hook and in each ch across. Turn. (7 sc)
Rows 2 onward: Ch 1, sc in each st across, turn. Continue until the handle reaches your preferred length. Fasten off, leaving a long tail for sewing.
Fold the strip lengthwise and whipstitch the long edges together to form a firm tube.
Before attaching the handles, lay the bag flat and mark where you want them to sit. Sew each end securely to the inside of the bag, approximately 4–5 cm below the top edge. Reinforce the attachment points with several passes of yarn.
Cotton can stretch under the weight of a full bag, so keep the handles sturdy and avoid making them longer than you need.
Leather Handles
If you prefer a more structured finish, use ready-made leather handles measuring approximately 50–60 cm.
Attach them with D-rings or the hardware supplied with the handles. Make sure the attachment points are firmly secured to the bag. If you plan to carry heavier items, a lining can help support the fabric.
6. Drawstring
Make a chain cord or a simple twisted cord long enough to pass through all the eyelets and tie comfortably.
Thread it through the openings, leaving both ends at the front of the bag. Tie the ends together or finish them with small tassels.
Give the cord a gentle pull to check that the top edge gathers evenly.
Assembly
- Weave in any remaining ends.
- Check that the base lies flat and the body hangs evenly.
- Attach the handles securely.
- Thread the drawstring through the eyelets.
- If desired, add a fabric lining for extra structure and to help keep smaller items from slipping through the stitches.
A lining is especially useful if you plan to carry sunglasses, keys or other small essentials.
Size Notes
The finished bag is intended to be a medium-sized summer tote, approximately 25 cm wide and 28–30 cm tall. Your exact measurements will depend on your yarn, tension and handle length.
To make the bag taller, add more granny-stitch rounds before beginning the top edge. Keep the color changes wherever they look balanced to you.
If you want to change the width, remember that the number of spaces in the setup round determines the number of granny clusters around the body. Adjust the base and setup round together rather than adding spaces at random.
A small test swatch is always worthwhile. Cotton and personal tension can make a surprising difference to the final size.
Why This Bag Matters
In a season of quick purchases and disposable totes, this one asks for a little time. Each color change is a small decision. Each round is a quiet accumulation of intention.
You choose the colors. You decide how long the handles should be. You make something that can go to the market, the beach, or simply sit by the door waiting for the next little adventure.
And when someone asks where you got it, you get to say the best four words in the craft:
“Thank you. I made it.”
Happy crocheting,