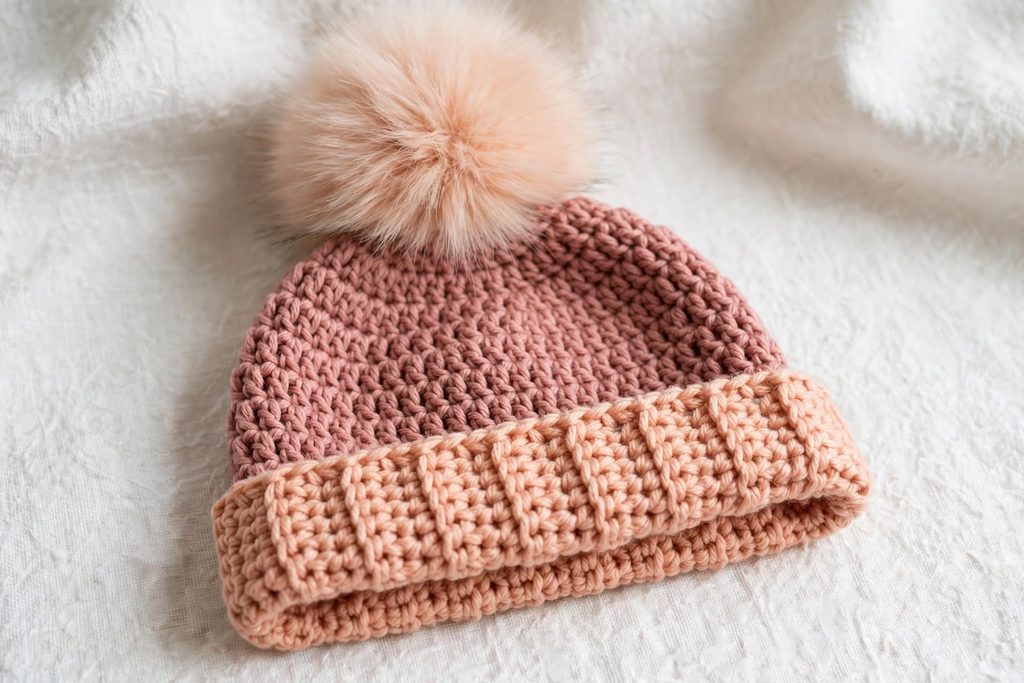
Every crochet hat starts the same way: a circle. This one refuses.
No magic ring. No increasing math. No “round 4, work (2 dc, dc in next 3) around” and the creeping suspicion you’ve lost count. This hat is a rectangle — the single most forgiving shape in crochet — that you fold, seam, and cinch like a tiny drawstring bag. Origami, but woollier.
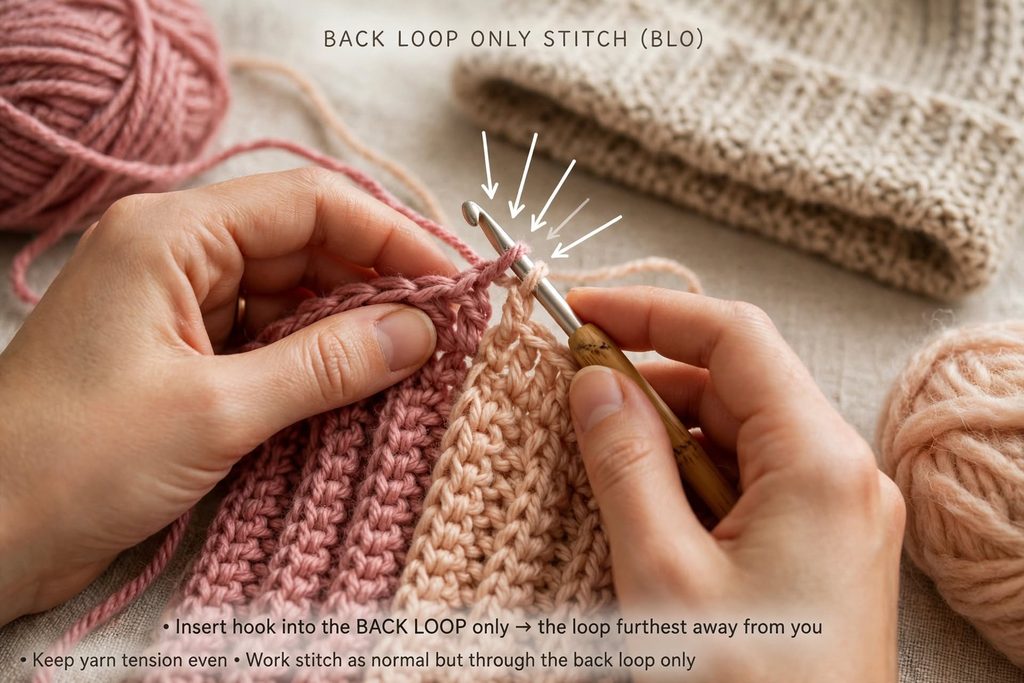
And here’s the plot twist that makes it perfect for beginners: the “knit look” rib isn’t knit at all. It’s plain double crochet worked into the back loop only, which pushes the fabric into deep, cozy ribs that look like they came off fancy needles. One stitch. One rectangle. About an hour. Then a hat happens.
Quick Facts (Before You Cast On)
| Detail | Answer |
|---|---|
| Skill Level | True beginner — chain, double crochet, done |
| Yarn | Worsted / Medium #4, 130–150 yards (Lion Brand Heartland or similar) |
| Hook | 6.0 mm (US J) |
| Gauge | 14 sts × 10 rows = 4″ in back-loop-only dc |
| Size | Rectangle 20″ wide × 9.5″ tall before finishing = Adult Medium. Finished hat approximately 8–8.5″ tall with brim folded. Fits 20–22″ head with stretch (20″ relaxed, stretches to 22″ in BLO rib) |
| Adjust | For circumference (fit around head) add/remove rows: Child approximately 45 rows = 18″, Adult Medium approximately 50 rows = 20″, Adult Large approximately 55 rows = 22″. For height add/remove chains: chain 36 = approximately 9.5″ tall, chain 40 = approximately 11″ slouchy |
| Time | About 1 hour for a steady crocheter — your first one may take two |
Fit note: Before finishing the seam, gently stretch the rectangle around your head or a measuring form. It should fit comfortably with slight stretch, without pulling tightly or slipping. The tape is the law.
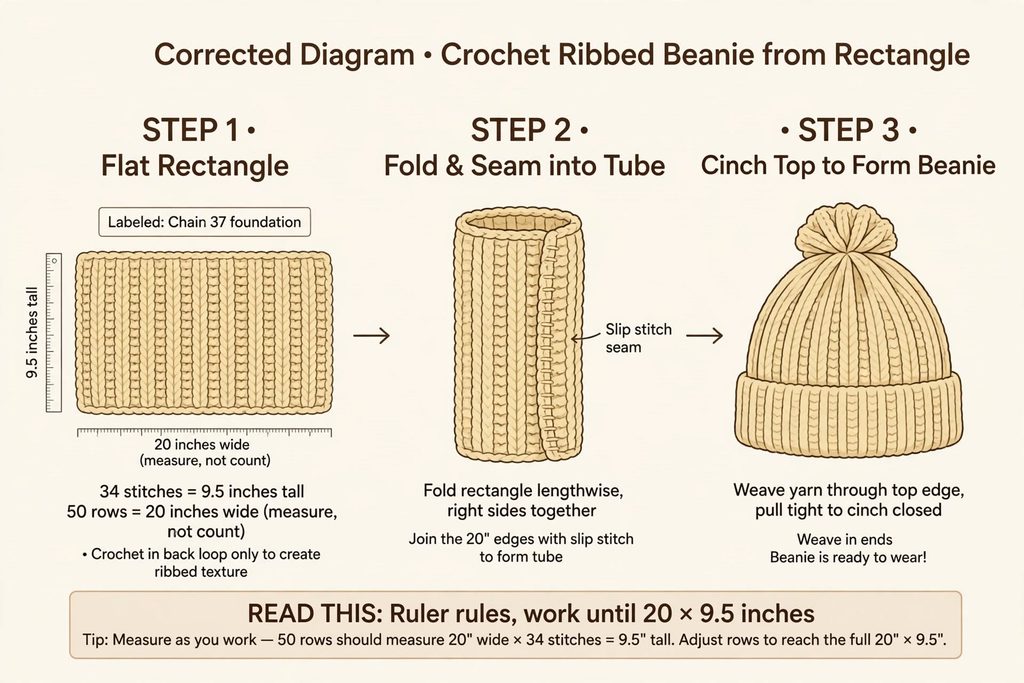
How the Rectangle Becomes a Hat (30-Second Geometry)
Skip this and the pattern will feel like sorcery. Read it and the pattern will feel obvious:
The 34-dc direction becomes the height of the hat (crown to brim). At gauge, 34 stitches measure approximately 9.5″ tall.
The row direction becomes the circumference — you keep working rows until the piece wraps around a 20–22″ head. At gauge 14 sts × 10 rows = 4″, you need about 50 rows for 20″. So 34 stitches = approximately 9.5″ tall, 50 rows = 20″ wide (measure, not count).
You join the first row to the last, cinch one open end shut, fold a brim, done.
So the measuring tape, not the row counter, is the real pattern. The counts below are the map; the tape is the law.
You Will Need
- Worsted weight yarn, 130–150 yards
- 6.0 mm (US J) crochet hook
- Yarn needle + scissors
- Optional: a pom-pom (store-bought or homemade — nobody’s judging)
The Pattern: A Rectangle, a Seam, a Cinch
Abbreviations (US terms):
ch = chain · dc = double crochet · BLO = back loop only · sl st = slip stitch · st = stitch
Foundation:
Ch 36.
Row 1:
Skip first 3 ch (counts as dc), dc in 4th ch from hook and in each remaining ch across. 34 sts total, including the turning chain. (This row = the hat’s height. At gauge it measures about 9.5″.)
Row 2 (BLO rib row):
Ch 3 (counts as dc), turn. Dc in BLO of the next 33 sts across. 34 sts total, including the turning chain.
Rows 3 onward:
Repeat Row 2 until the piece measures about 20″ along the long side — at the gauge above, this usually lands around 48–52 rows. Count if you like, but trust the tape: when the rectangle wraps comfortably around your head with a gentle overlap, stop.
READ THIS: Ruler rules: work until the rectangle measures approximately 20 × 9.5 inches. At the stated gauge, about 50 rows should measure 20″ wide, while the 34-stitch direction should measure approximately 9.5″ tall. Adjust the number of rows to reach the desired circumference.
Do not fasten off.
Seam into tube:

Fold the rectangle in half, bringing Row 1 to meet your last row (the short 9.5″ sides together). Ch 1, then sl st through both layers across that short edge to close the tube — one sl st per stitch along the edge, about 34 sl st. Keep them snug but not strangling.
Cinch the top:
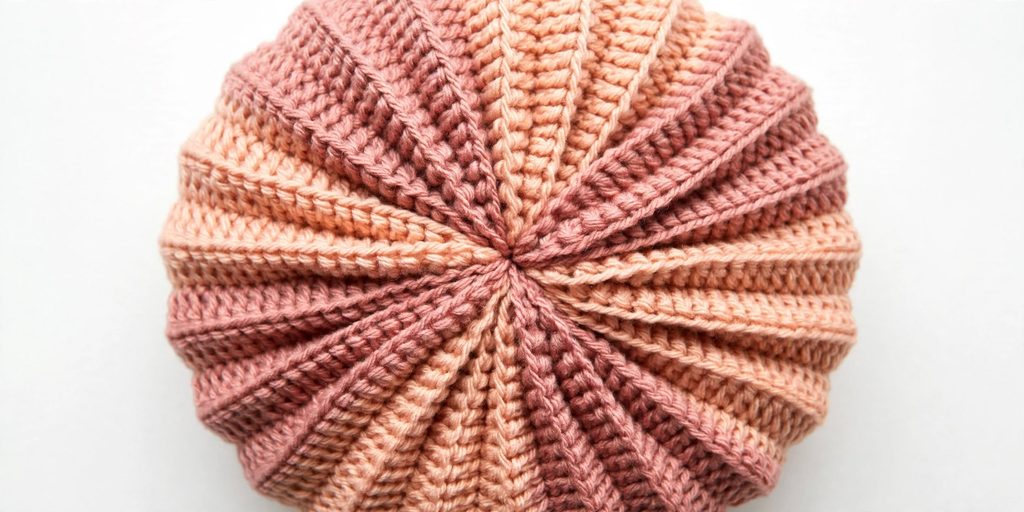
Cut the yarn, leaving a 20″ tail, and thread the yarn needle. Weave the needle in and out around the top edge of the tube (one stitch per row — you’ll have roughly 50). Pull tight to gather it like a drawstring bag. Sew a few stitches across the center to close the hole, fasten off, and weave in ends.
Brim:
Fold up the bottom edge 2.5–3″ for the ribbed brim. The finished hat will be slightly shorter after the crown is gathered. The folded brim creates a thicker, double-layered edge. If you want a taller, slouchier hat, increase the foundation chain length. Add a pom-pom if you like. Done.
The Color-Block Version — CORRECTED
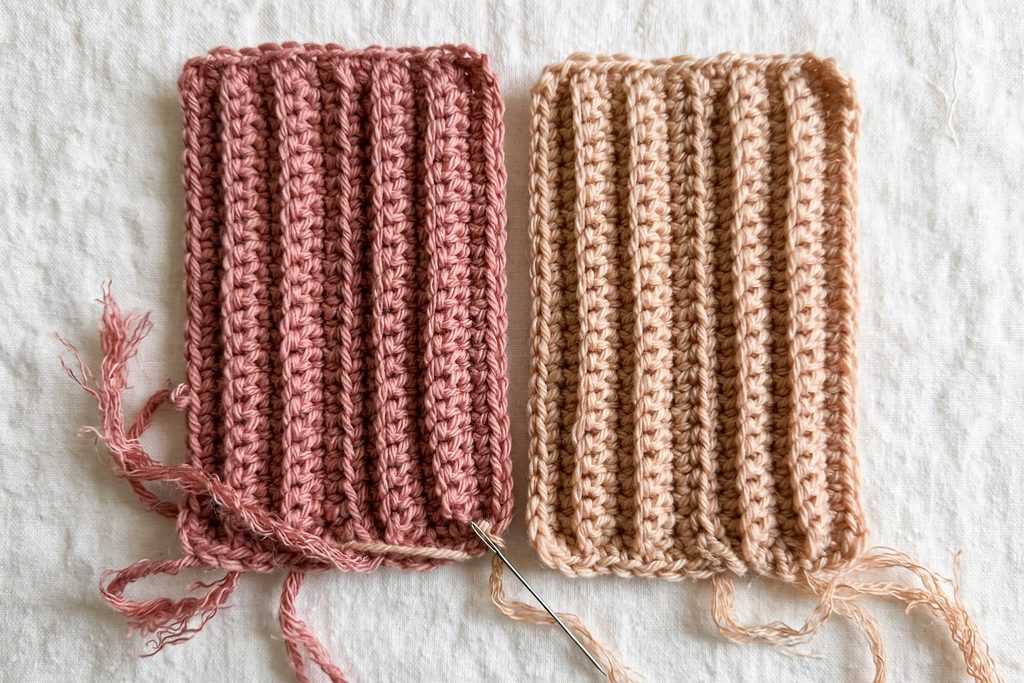
To get a brim in a different color (for example, dusty rose + peach), divide the rectangle into two color sections along its height: Color B for the brim side and Color A for the crown side.
Because you turn your work after every row, the order of the colors must alternate to keep each color in the same physical position on the rectangle.
Before making the full hat, test the color placement on a small swatch:
- Chain 36 and work the first row with Color B for the first 17 stitches, then Color A for the remaining 17 stitches.
- Turn. On the next row, work Color A for the first 17 stitches, then Color B for the remaining 17 stitches.
- Continue alternating the order of the colors on every row: Color B then Color A, followed by Color A then Color B.
- Check that Color B stays along the same long edge of the rectangle and Color A stays along the opposite edge.
If the swatch shows two consistent color sections, use the same sequence for the full hat. When the rectangle is folded and seamed, the two sections will form horizontal color bands around the hat. Position Color B at the bottom edge so it becomes the folded brim.
If you want a vertical two-tone effect instead: Work the first approximately 25 rows in Color A and the next approximately 25 rows in Color B. The finished hat will have two color sections around its circumference, with the color change at the back seam. The brim will contain both colors.
Troubleshooting, Honestly
The hat is too tight or too loose. The row direction controls the fit: too tight? Work a few more rows before seaming. Too loose? Stop a few rows earlier. Adjusting after the fact costs one seam, not a whole hat.
The hat is too short or too tall. That’s the foundation chain — too short? Chain a few more (each chain ≈ 1/4″). Too tall? Chain fewer.
My “rib” looks flat, not ribbed. Make sure you’re going into the back loop only — the loop farthest from you. If both loops creep in, the texture disappears and you get plain fabric. One loop is the whole secret.
There’s a gap at the seam. Seam with the right side facing out, and pull each sl st snug. If a hole still shows, a few whipstitches over it with the yarn tail will close it invisibly.
The top hole won’t close. Cinch harder than feels polite, then sew across the center twice, in different directions. The hat will never tell.
Care, Because Hats Get Worn Into the Ground
Check your yarn label first — most worsted acrylics tolerate a gentle machine wash in a laundry bag, wools usually prefer hand washing. Reshape damp and dry flat; never hang a wet hat (gravity is patient and will make it long). Between washes, a quick steam hover revives the rib beautifully. Always check that your yarn can tolerate steam and keep heat away from the fibers.
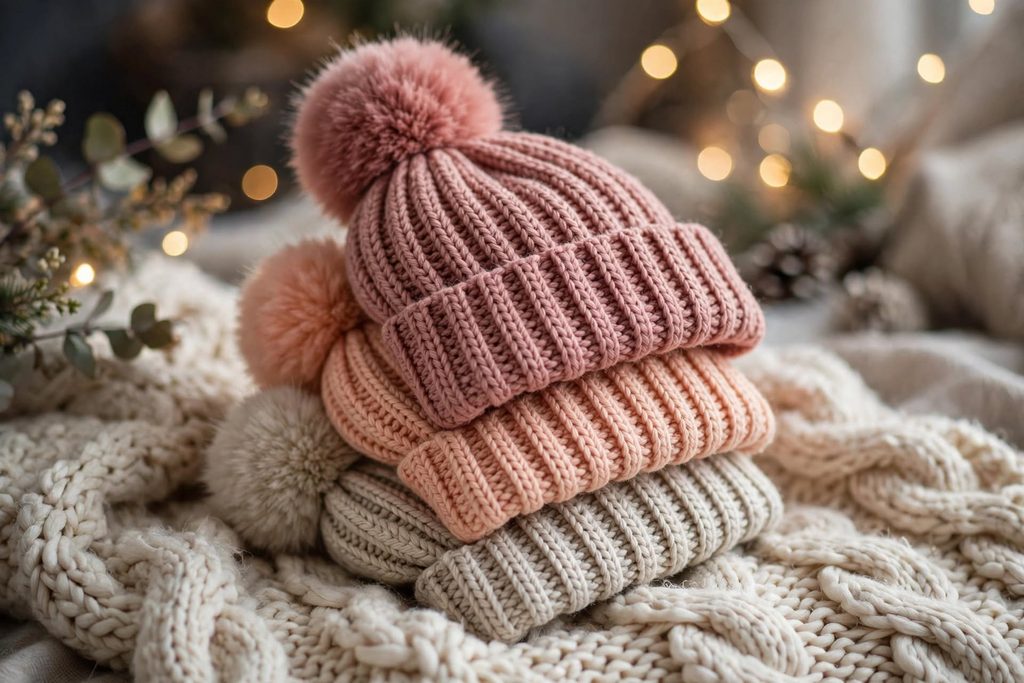
Why a Rectangle Beats a Circle (For Your First Hat)
Crocheting in the round is a skill. Increasing in a spiral without a visible seam is another skill. This hat asks for neither — it only asks that you can crochet a straight line and trust a measuring tape. Yet it teaches you everything a first hat should: gauge, ribbing, seaming, and the deeply satisfying moment when a flat, unpromising rectangle suddenly stands up and becomes a thing you wear.
An hour or two of back-and-forth, one seam, one cinch — and then you walk outside in the cold wearing something your own hands decided should exist. There’s no better hour in crochet.