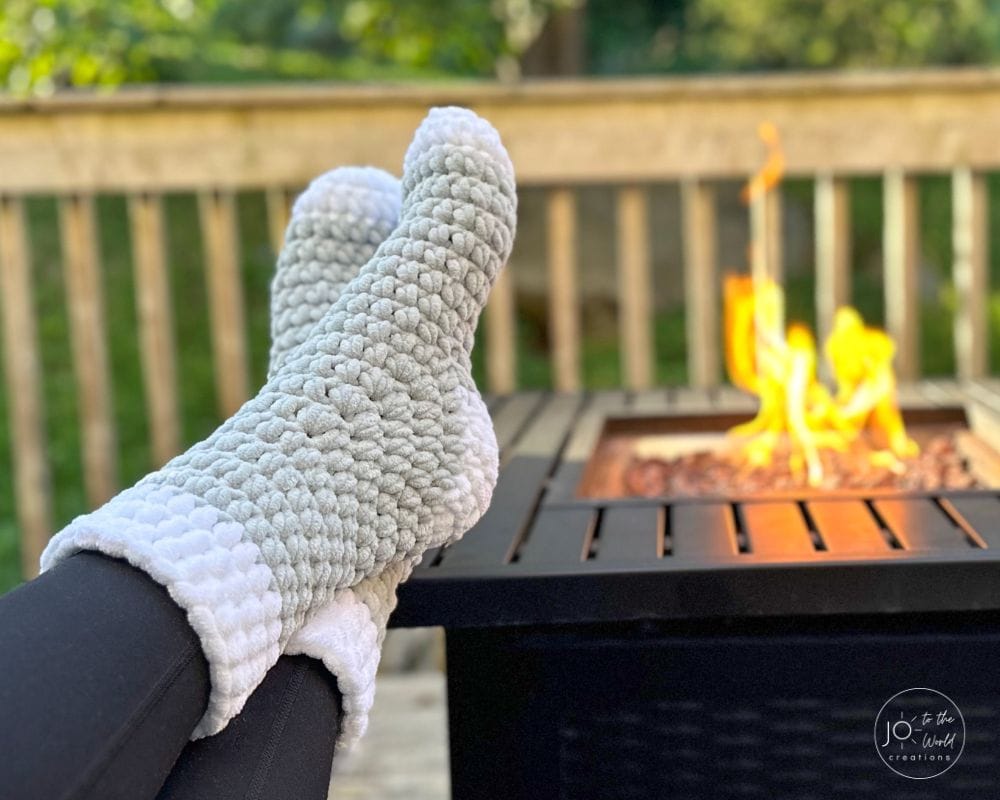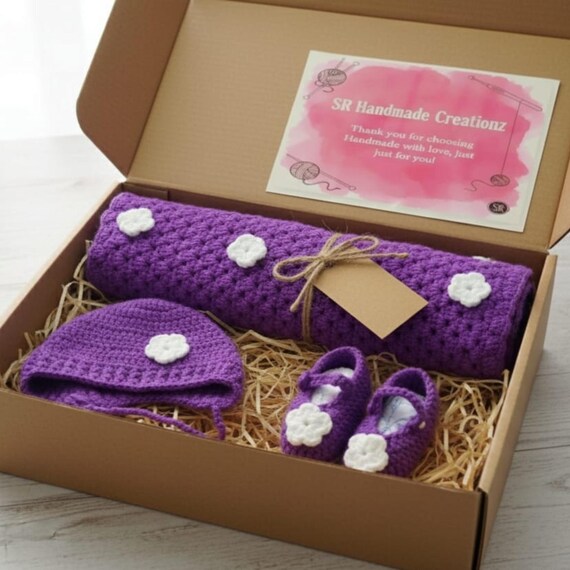
You do not put on these slippers.
Tag: cozy crochet slippers
-

The Crochet Slippers That Make Your Feet Feel Loved
You slip into a decision. A decision that the floor is no longer allowed to be cold. That your toes deserve a hug. That the 47 steps between your bed and the coffee maker should feel like walking on a cloud made of good intentions.Welcome to the only footwear that understands you are not going anywhere — and celebrates it.
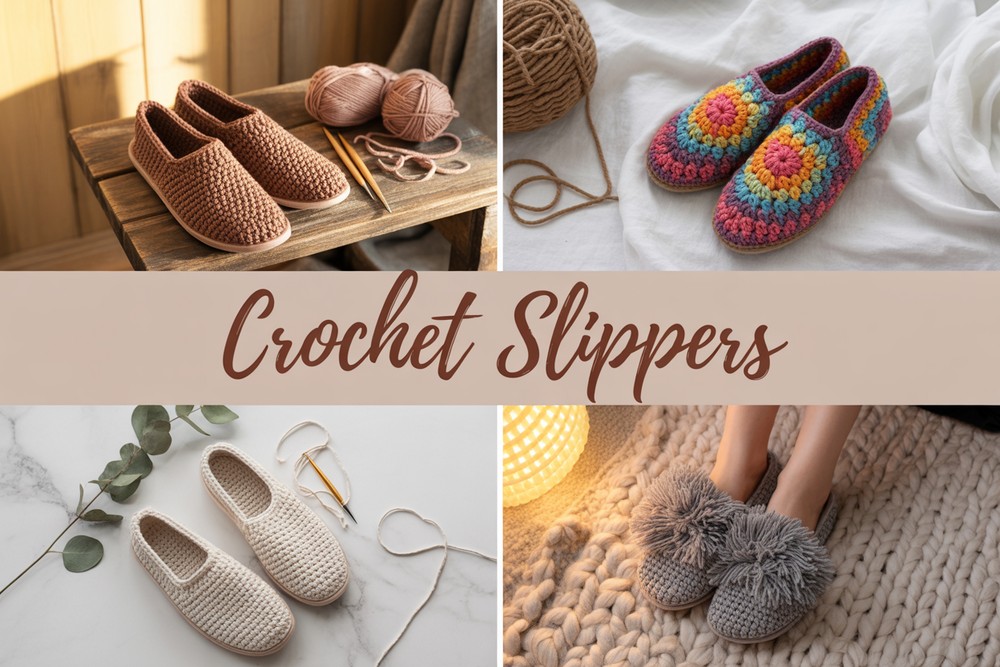
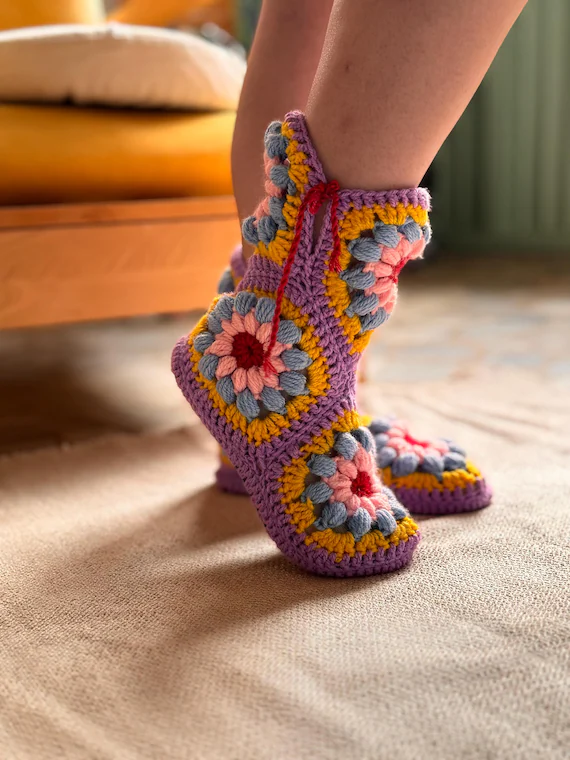
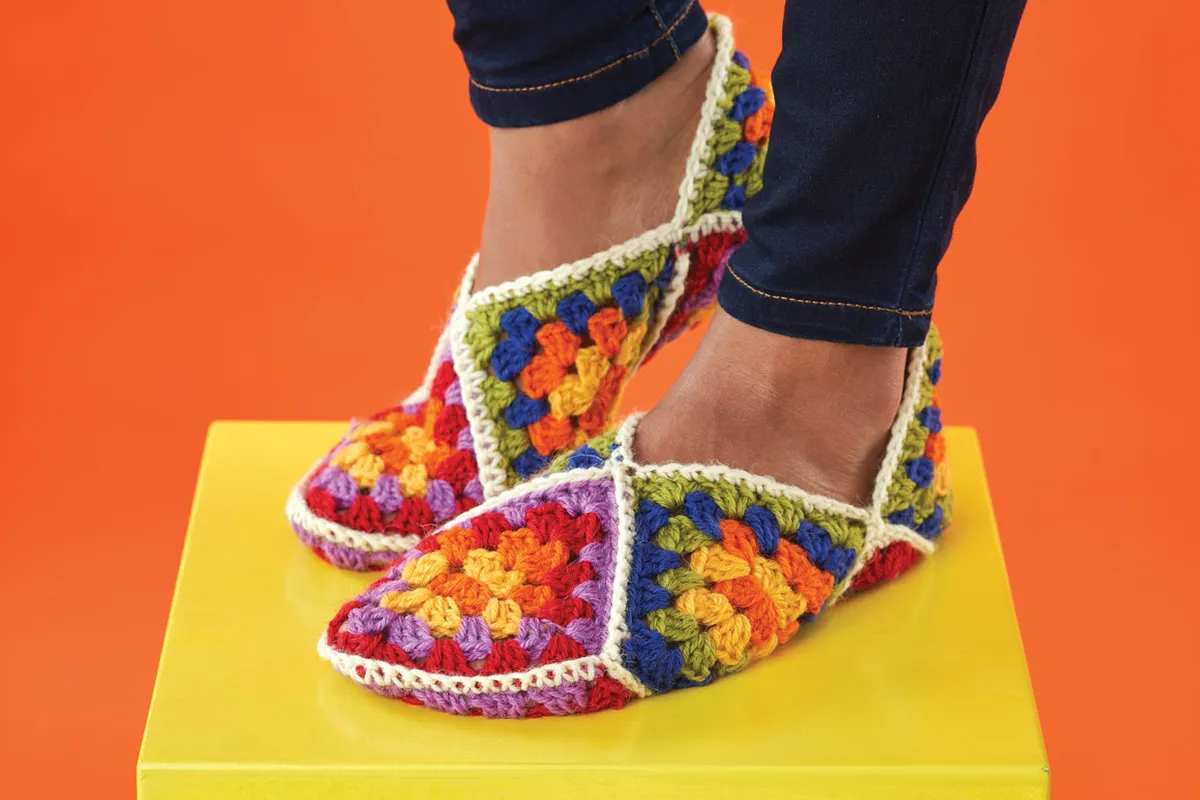
Look at them. A granny square exploded into footwear. Red, orange, yellow, green, blue, purple — all the colors of a weather phenomenon, compressed into something that fits under your jeans.Here is the first paradox that breaks footwear logic: the louder the slipper, the quieter the morning. You wake up gray. The sky is gray. Your inbox is gray. And then — your feet are wearing a carnival. It is impossible to remain pessimistic when your toes are dressed like a pride parade. The rainbow slipper is not fashion. It is pharmaceutical fiber. It is a serotonin delivery system that happens to keep your soles warm.And the granny square? That is not just a pattern. That is geometry made by grandmothers. Each color change is a decision someone made while listening to a podcast, drinking tea, and refusing to rush. The center of the square is a mandala. The rounds radiate outward like ripples from a good decision. When you wear granny-square slippers, you are literally walking on someone’s patience — even if that someone was you, three Netflix episodes ago.The practical magic: granny squares are modular. You make two squares. You fold them. You seam the toe, the heel, the instep. That is it. No shaping. No increasing. No crying over a pattern that assumes you have a PhD in spatial reasoning. Two squares. Folded. Done. Your feet are now art galleries.
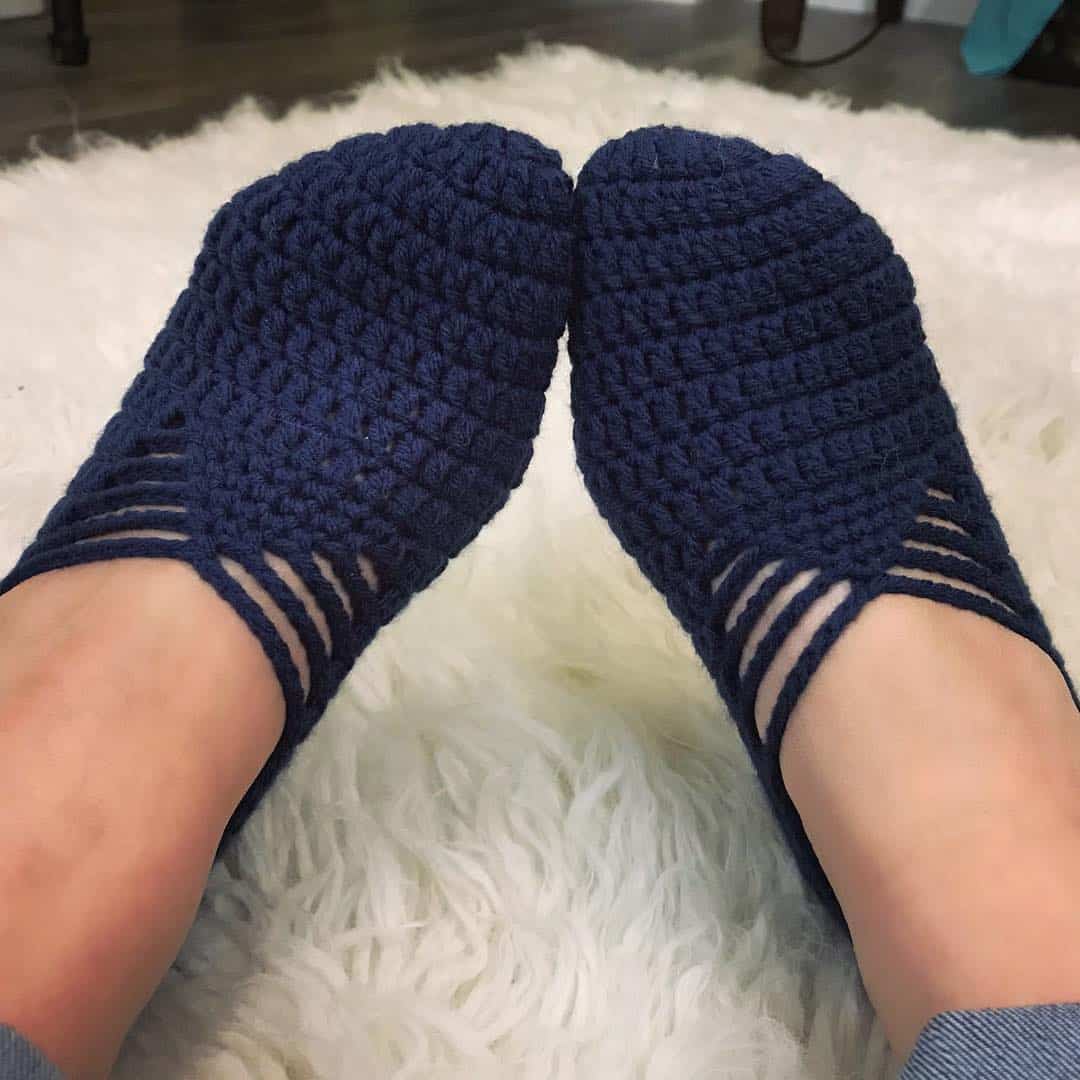
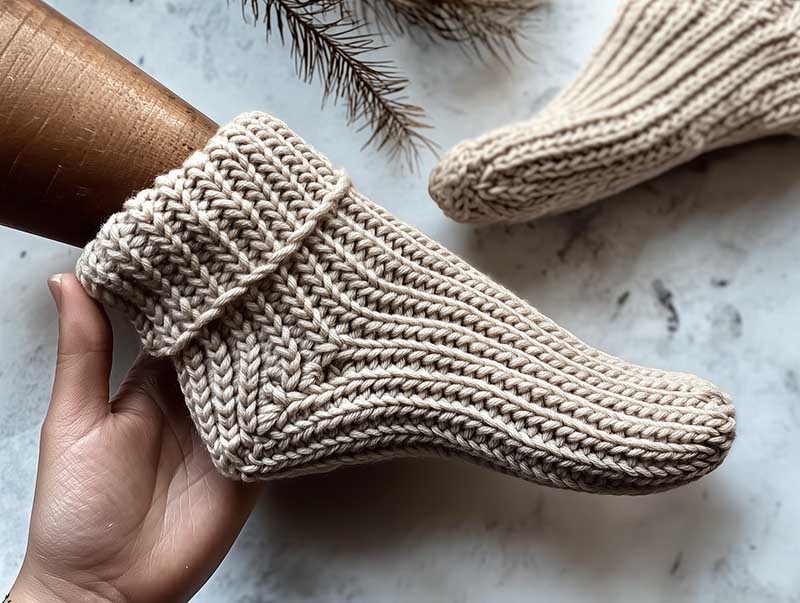
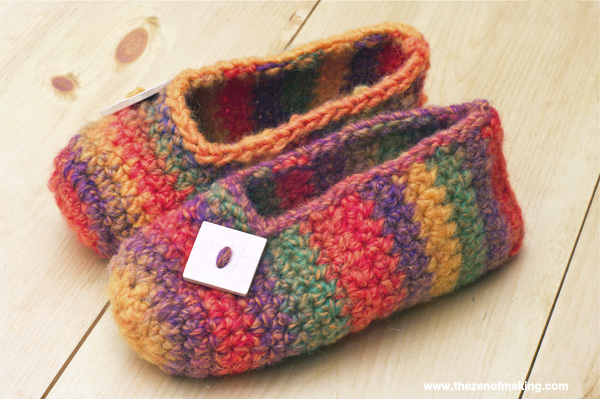
Now, the other pair. Not rainbow. Not loud. But textured — deeply, satisfyingly textured — in shades of blue and gray that look like the ocean decided to knit itself a blanket for your feet.Here is the twist: this texture is not decoration. It is braille for the soul. When you run your thumb across the cables and bobbles, your nervous system receives a message it cannot translate into words. Something about safety. Something about being held. Something about the fact that your mother used to tuck you in, and now you are 34 and someone — maybe you — made you slippers that tuck in your feet.The cable stitch in crochet is a lie. It pretends to be complicated. It looks like it required a degree in textile engineering. But it is just front-post double crochet arranged in a sequence. You skip a stitch, you work around the post of the next, you go back and catch the skipped one. That is the entire secret. The slipper looks like it was made in an Irish cottage by a woman who has never heard of Wi-Fi. It was actually made in your living room while you watched a true-crime documentary.And the fit? Cable stitches have memory. They compress when you step, then expand when you lift. They learn your foot. After a week, these slippers do not just fit you — they recognize you. They are the closest thing to a footprint made of wool.
Look at the balls of yarn on the table. One is a rainbow swirl, still wound tight, still full of potential. The other is a variegated gray, half-used, trailing off like a sentence that does not need to end.Here is the megalogic that defeats fast fashion: yarn remembers. The rainbow ball remembers being a sheep, or a cotton plant, or a factory in Turkey — depending on its label. It remembers the dye bath. It remembers being wound. It remembers sitting in a craft store, waiting for someone brave enough to take it home.And when you crochet it into a slipper, you are not just making footwear. You are encoding time. The two hours it took to make the left slipper are now trapped in the stitches. They cannot be deleted. They cannot be optimized. They exist, permanently, as warmth. Every time you put on that slipper, you are stepping into two hours of your own life that you chose to spend slowly, deliberately, with your hands instead of your thumbs.A store-bought slipper costs time at a factory you will never see. A crochet slipper costs time at your own kitchen table. The difference is: one is anonymous. The other is autobiographical.
Now, look down. Your feet, inside these handmade vessels, touching the ground.Here is where logic completely dissolves. A crochet slipper has no sole — not really. It is just more yarn. It offers no arch support, no gel cushioning, no patented technology developed by NASA. And yet, people who wear them report feeling more grounded than in orthopedic inserts.Why? Because the ground is not the enemy. The cold floor is not attacking you. It is simply existing at a different temperature, and the crochet slipper mediates that conversation. It does not block the floor. It translates it. You still feel the wood grain. You still feel the tile’s coolness. But it is filtered through wool, through cotton, through the intention of someone who wanted your feet to be comfortable.And when the slipper finally wears thin — when the heel goes fuzzy and the toe goes transparent — you do not throw it away. You patch it. You add a new sole. You darn the hole. You extend its life because its life is intertwined with yours. You remember making it. You remember the movie that was on. You remember the cat sitting on the pattern.You are not wearing slippers. You are wearing a diary that walks.
So here is the truth, delivered with the gentleness of wool against morning-cold skin:You need these slippers. Not because your feet are cold — though they are. You need them because your soul is tired of speed. Tired of notifications. Tired of things that arrive in two days and break in two weeks.Make the rainbow pair. Make the textured pair. Make both, or make neither and simply buy them from someone who understood that the world needs more softness. But whatever you do, put them on. Stand up. Walk to the kitchen. Feel the floor through the filter of handmade patience.Your feet will thank you. Your morning will thank you. And the cold tiles will finally, mercifully, give up.
Happy crocheting. -
Easy Crochet Slippers Pattern: Granny Square House Slippers That Actually Stay on Your Feet
I once made a pair of crochet slippers so beautiful I photographed them before I tried them on. Rainbow granny squares. Cream edging. A little pom-pom on the ankle. They looked like something a fairy godmother would wear to brunch. Then I put them on. The sole was two millimeters thick. I could feel every floorboard in my apartment through the yarn. After three steps, I understood why people say handmade slippers are decorative. I wore them for exactly one evening, then hid them in a drawer where beautiful failures go to die.
That pair taught me the single most important rule of crochet slippers: if the sole is an afterthought, the slipper is a decoration.Before we begin, let me save you from the mistake I made. Most crochet slipper patterns focus on the decorative part — the granny squares — but almost ignore the sole. And that is exactly why so many handmade slippers end up sitting on a shelf instead of on your feet. The good news? A pair of granny square slippers with a proper sole takes 4 to 6 hours, costs less than a latte at a fancy café, and will outlast every store-bought pair you have ever owned. Below is the exact method — with real stitch counts, real yardage, and the one structural trick that separates slippers you display from slippers you live in.Common Crochet Slipper Mistakes
Before we pick up the hook, let us talk about what goes wrong. Because almost every failed slipper I have made — and I have made many — failed for one of these three reasons.The Sole Is Too Thin
A single layer of crochet fabric is roughly 3 to 5 mm thick. That is fine for a dishcloth. It is not fine for a foot that will press against hardwood, tile, or cold concrete. Without padding, you feel everything. And within two weeks, the sole felts into a flat, dirty pancake.The fix: Crochet the sole in two layers — an outer sole in sturdy yarn and an inner sole in soft yarn — then work the upper directly into the edge of the doubled sole. This gives you 8 to 10 mm of cushioning without needing to sew on a separate insole.The Opening Is Too Wide
A slipper that gapes at the ankle is a slipper that slides off when you walk. I have seen beautiful granny-square slippers ruined by a loose cuff that refuses to grip. The foot needs to feel held, not swimming.The fix: Work the ankle cuff in front-post and back-post double crochet — a ribbed stitch with natural elasticity. It hugs the ankle without elastic, without buttons, and without the fuss of drawstrings.The Yarn Is Wrong
I made my first pair in 100% cotton because the colors were irresistible. Within a month, the cotton had stretched, the shape had gone rectangular, and the slippers looked like sad oven mitts. Cotton has no memory. Wool has memory. Acrylic has memory. Cotton just gives up.The fix: Use a wool-acrylic blend (70/30 or 80/20) or pure wool. The fiber must be able to spring back into shape after being squashed by a foot.Materials You Need
-
Yarn: Worsted-weight wool-acrylic blend, approximately 150 to 180 meters total (about 1.5 to 2 skeins of 100 m yarn). You will use roughly 40 m for the sole, 80 m for the two granny squares, and 30 to 40 m for the cuff and edging.
-
Hook: 4.5 mm (US 7) for the main work, 4 mm (US G) for the ribbed cuff if you tend to crochet loosely.
-
Stitch marker: One, for marking the start of rounds.
-
Tapestry needle: For weaving in ends and joining.
-
Optional: Felt insole and faux leather sole pads for extra comfort.
Gauge: 12 double crochet stitches × 7 rows = 5 cm × 5 cm (2 in × 2 in). If your gauge is off, the slipper will be too large or too small. Make one test square before committing.The Granny Squares
Each slipper uses two granny squares joined at the toe. The squares should measure approximately 10 to 11 cm (4 to 4.5 in) per side.Round 1: Chain 4. Join with a slip stitch to form a ring. Chain 3 (counts as first double crochet), work 2 double crochet into the ring, chain 2, work 3 double crochet into the ring, chain 2 — repeat from * three more times. You now have four clusters of 3 double crochet, separated by chain-2 spaces. Join with a slip stitch to the top of the starting chain-3.Round 2: Slip stitch into the next chain-2 space. Chain 3, work 2 double crochet into the same space, chain 2, work 3 double crochet into the same space (this forms the first corner). Chain 1, work (3 double crochet, chain 2, 3 double crochet) into the next chain-2 space — repeat from * around. Join with a slip stitch.Round 3: Slip stitch to the next corner space. Chain 3, work (2 double crochet, chain 2, 3 double crochet) into the same corner space. Chain 1, work 3 double crochet into the next chain-1 space, chain 1, work (3 double crochet, chain 2, 3 double crochet) into the next corner space — repeat from * around. Join.Round 4: Repeat Round 3, working 3 double crochet into each side space and (3 double crochet, chain 2, 3 double crochet) into each corner. After Round 4, your square should measure 10 to 11 cm. Fasten off, leaving a 20 cm tail for sewing.For colorwork: Change colors at the start of each round for the classic rainbow effect. Weave in ends as you go — a granny square with six loose tails on the back is a misery to finish later.The Doubled Sole
The sole is worked as an oval in continuous rounds, then folded double for thickness.With the 4.5 mm hook and your sole color, chain 13.Round 1: Work 2 half-double crochet in the second chain from the hook. Half-double crochet in each chain across to the last chain. Work 5 half-double crochet in the last chain. Rotate to work along the opposite side of the chain. Half-double crochet in each stitch across to the last stitch. Work 3 half-double crochet in the last stitch. Do not join — place a stitch marker in the first stitch and work in continuous spirals.Round 2: Work 2 half-double crochet in each of the next 2 stitches, half-double crochet in each stitch across to the corner, work 2 half-double crochet in each of the next 5 stitches, half-double crochet across, work 2 half-double crochet in each of the next 3 stitches. You now have a firm oval approximately 24 cm long and 9 cm wide — roughly the shape of a foot without toes.Round 3: Half-double crochet in each stitch around, working 2 half-double crochet in the center stitch of each curved end. You should now have approximately 44 stitches total.Fold the sole in half along its length, wrong sides together. The fold creates a double layer. You will work the upper directly into the edge stitches of this folded sole.Assembly
Take two granny squares. Place them side by side, overlapping by approximately 3 cm at one corner — this forms the toe. Sew the overlap with whip stitch using your tapestry needle. This joined pair now forms the front upper of the slipper.Attach the yarn at the center back of the folded sole. Single crochet evenly around the entire edge of the doubled sole, working through both layers. You should have approximately 40 to 44 single crochet stitches.Round 1 of upper: Single crochet in each stitch around.Round 2: Attach the joined granny squares to the front half of the sole edge. Hold the squares against the sole with the toe pointing forward. Single crochet through both the sole edge and the corresponding stitch of the granny square, working across the front 20 to 22 stitches. When you reach the side edges of the squares, stop attaching and single crochet in the remaining sole stitches only. This leaves the back of the slipper open for the heel.Round 3 to 6: Single crochet in each stitch around, decreasing 1 stitch at each side of the heel opening every other round. This gradually shapes the heel cup.The Ribbed Ankle Cuff
The cuff is what keeps the slipper on your foot. Worked in ribbed stitches, it hugs the ankle without feeling tight.Round 1: With the right side facing, attach yarn at the back center of the heel opening. Chain 2. Work front-post double crochet around the next stitch, back-post double crochet around the next. Alternate FPDC and BPDC around the entire opening. Join with a slip stitch.Rounds 2 to 8: Chain 2. Work FPDC around each FPDC from the previous round, and BPDC around each BPDC. This creates a vertical rib with natural stretch. After 8 rounds, the cuff should measure approximately 8 to 10 cm tall (3 to 4 in).Final round: Work a round of single crochet for a clean edge. Fasten off and weave in all ends.Sizing Tips
I am not going to drown you in charts. Here is how to adjust this pattern for any foot.For a smaller foot (EU 35–37 / US 5–7): Make the granny squares through Round 3 only (not Round 4). Work the sole to 22 cm long instead of 24 cm.For a larger foot (EU 41–43 / US 9–11): Work the granny squares through Round 5. Increase the sole to 26 cm long and add 2 extra increase stitches at each end of Round 2.For a high instep: Work 2 extra rounds of single crochet on the upper before starting the ribbed cuff. This adds height over the bridge of the foot.For a wider ankle: Use a 5 mm hook for the cuff rounds only, or work 2 extra rounds of ribbing.The Secret to Comfortable Slippers
There is one detail that separates slippers you tolerate from slippers you reach for every morning: the insole.After you have finished the slipper, cut a piece of thick felt or fleece to the shape of the inner sole. It should be slightly smaller than the crocheted sole so it does not bunch at the edges. Hand-sew it to the inside using matching thread and a simple running stitch around the perimeter.This felt layer does three things: it adds cushioning, it absorbs moisture, and it prevents the crocheted sole from felting against your bare foot. A slipper with a felt insole feels like a real shoe. A slipper without one feels like a sock that gave up.How Long Does This Actually Take?
Here is the honest breakdown from someone who has made dozens of pairs:-
Granny squares (4): 2 to 2.5 hours, including color changes and weaving ends
-
Soles (2): 45 minutes to 1 hour
-
Joining and upper: 1 to 1.5 hours
-
Ribbed cuffs (2): 45 minutes
-
Felt insoles and finishing: 20 minutes
Total: 5 to 6 hours for the pair. Not a weekend project. Not an hour. A satisfying evening and a morning. The kind of time that makes you appreciate them when you slide your feet in.FAQ
Can crochet slippers be machine washed?Yes, if you used wool-acrylic blend yarn. Wash on a gentle cycle in cold water and lay flat to dry. If you used 100% wool, hand-wash only to prevent felting.How long does it take to crochet slippers?This granny square pattern takes 5 to 6 hours for a complete adult pair, including finishing.What yarn is best for crochet slippers?Worsted-weight wool-acrylic blend (70/30 or 80/20) is ideal. It offers warmth, structure, and memory. Avoid 100% cotton — it stretches and loses shape quickly.Do crochet slippers stretch?All crochet stretches slightly with wear, which is why the ribbed cuff is essential. The FPDC/BPDC rib hugs the ankle and recovers its shape after each wear.Can I add a non-slip sole?Yes. You can sew on faux leather sole pads or apply puffy fabric paint dots to the bottom of the crocheted sole for grip.Are these slippers suitable for beginners?Absolutely. The stitches are basic (double crochet, half-double crochet, single crochet). The only challenge is sewing the pieces together, which requires patience, not advanced skill. -
-

I Crocheted the Coziest Slippers in 2 Hours (Free Pattern + Photos)
This post contains an affiliate link. If you click, you can check out and purchase the Pineapple Slippers crochet pattern on Creative Fabrica. New users get 10 free downloads.”
Chunky crochet slippers in oatmeal color, styled on a white wooden floor — cozy and inviting.Free Chunky Crochet Slipper Pattern for BeginnersMy feet have not touched cold floor in two weeks. And it’s not because I finally turned on the heating — it’s because I made these slippers.Remember that mountain of YarnArt Alpine I had left after the backpack? Well, I had about 80 grams sitting in a basket, judging me every time I walked past. Too little for another bag. Too much to throw away. So I did what any reasonable person would do at 9 PM on a Tuesday: I looked up slipper patterns.I tried three free patterns online. First one came out shaped like a banana. Second one had a hole where my pinky toe poked through. Third one was so tight I couldn’t get my foot in. So I did my usual thing — frankensteined my own from the best parts of all three, tweaked the toe shape, added a proper sole, and boom. Coziest thing I’ve ever made.What You’ll Need
Everything for chunky crochet slippers — super bulky yarn, 8mm hook, scissors, and a tapestry needle. Nothing fancy.-
Yarn — 80-100g super bulky weight (Category 6). I used YarnArt Alpine in “Oatmeal.” Any chunky yarn works. Acrylic or acrylic blend is best — holds shape, machine washable, and if you step in a puddle you won’t cry.
-
Hook — 8mm. Same as the backpack. Consistency is key.
-
Scissors — regular ones.
-
Tapestry needle — big eye. You’ll sew the sole closed, so yes, you need it.
-
Stitch marker — scrap of yarn. I use the same neon pink piece from the beanie. It’s seen things.
About the yarn: Don’t use 100% wool for slippers unless you enjoy hand-washing things that touch your feet. Go with acrylic or a blend. I learned this the hard way with my first pair — pure wool, felted after two washes, now they fit my 5-year-old nephew.The Pattern
Fair warning: I don’t count stitches perfectly. My tension changes when I’m watching a tense scene in a show. These slippers still fit. So don’t panic.The Sole (worked flat, then joined)
This is the foundation. Get this right and everything else is easy.-
Chain 12 (for women’s size 7-8 / EU 38-39). For smaller feet, chain 10. For larger, chain 14.
-
Row 1: Sc in 2nd chain from hook, sc in each chain across. 11 sc.
-
Row 2: Chain 1, turn. 2 sc in first stitch, sc in each stitch across, 2 sc in last stitch. 13 sc.
-
Row 3: Chain 1, turn. Sc in each stitch across. 13 sc.
-
Rows 4-10: Repeat Row 3. You’re making a rectangle with rounded ends.
At Row 10, wrap it around your foot. It should cover from your heel to the ball of your foot. Too short? Add rows. Too long? Frog back.Round the toe: Sc around the entire rectangle, working 3 sc in each corner stitch to round it. Don’t cut yarn.The Sides (worked in rounds)
Now it starts looking like a slipper.-
Round 1: Sc in each stitch around the sole. Place marker in first stitch.
-
Rounds 2-6: Sc in each stitch around. That’s it. Just go around and around.
At Round 4, try it on. The sides should come up to about mid-foot. Want them higher? Add a round or two. I like them at 6 rounds — covers enough to stay warm, low enough to slip on without hands.The Toe (decrease rounds)
This shapes the front so your toes don’t slide out.-
Round 7: Sc in next 4 sts, sc2tog. Repeat around.
-
Round 8: Sc in each st around.
-
Round 9: Sc in next 3 sts, sc2tog. Repeat around.
-
Round 10: Sc in each st around.
-
Round 11: Sc in next 2 sts, sc2tog. Repeat around.
-
Round 12: Sc2tog around until hole closes.
Cut yarn, thread through remaining stitches, pull tight. Weave in end.The Heel (separate piece, then attached)
I tried crocheting the heel in one piece with the sole. It came out lumpy and my heel sat on a ridge. Never again.-
Chain 8.
-
Rows 1-6: Sc in each stitch across. Chain 1, turn. Simple rectangle.
-
Fold in half — this is your heel cup.
-
Sew to the back of the slipper using whip stitch. Match the bottom edge to the sole, the sides to the side rounds.
Important: Sew through both layers of the heel piece and into the slipper. This makes it sturdy. I skipped this on my first pair and the heel flapped open like a mouth.The Non-Slip Sole
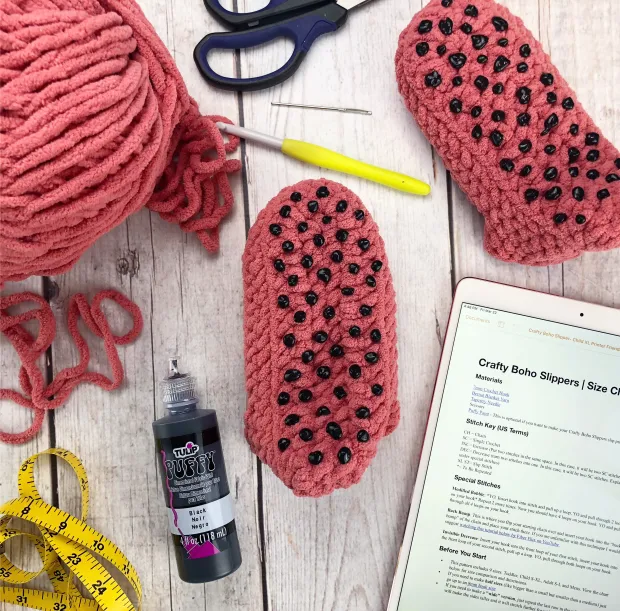
Puffy paint dots on the bottom of crochet slippers — cheap, effective, and machine-washable.Crochet + smooth floor = ice skating. I learned this the hard way when I slid across my kitchen reaching for the kettle.Solution: Puffy paint. The fabric kind, from the kids’ craft section. About $2.-
Turn slipper inside out.
-
Make dots or lines on the sole with puffy paint.
-
Let dry for 24 hours. Seriously. I got impatient at 12 hours and the dots smeared.
-
Turn right side out. Done.
Alternative: Sew on suede patches (from old jacket or buy pre-cut). Looks fancier, lasts longer. I did this on my second pair — used a piece of my husband’s old suede elbow-patch jacket. He still doesn’t know.
Sizing (Real Talk)
TableWho Sole chain Sole rows Side rounds Kid (size 10-13) 8 8 4 Teen/Women small (5-6) 10 9 5 Women average (7-8) 12 10 6 Women large / Men small (9-10) 14 11 7 Men average (11-12) 16 12 7 My husband is a size 11. I made him a pair in navy blue with suede soles. He wears them every morning while making coffee. Says they’re “acceptable.” From him, that’s a 5-star review.When Things Go Wrong
Left — my first attempt with a hole at the toe and lumpy heel. Right — the final version that actually stays on my foot.Slipper slides off my heel. The sides are too low or the heel cup is too shallow. Add 2 more rounds to the sides, or make the heel piece taller.Toe feels cramped. You decreased too fast. Frog Rounds 7-12 and add an extra round of plain sc between decreases.Sole is too thin / I feel every pebble on the floor. You crocheted too loosely. Next time use a 7mm hook for the sole only, or double-strand the yarn.They stretch out after a week. Acrylic blend with no wool content stretches more. Add a round of tighter sc around the opening, or embrace the slouchy look. I call mine “relaxed fit.”What I Do With These Slippers
How I package slippers as gifts — kraft box, dried lavender sachet, tag with care instructions, baker’s twine.This is my new go-to housewarming gift. Everyone has enough candles. Nobody has handmade slippers.I package them in a kraft box with a little sachet of dried lavender (from my garden, very fancy), a tag that says “hand wash cold, lay flat to dry, puffy paint soles,” and baker’s twine. Costs about $1 extra, looks like $20.I’ve made six pairs so far:-
Oatmeal for me
-
Gray for my mom
-
Navy for my husband
-
Burgundy for my sister
-
Mustard for my best friend
-
Second oatmeal pair for me because the first ones got “borrowed” by my husband
What’s Next?
My second pair in progress — chunky yarn and a cozy evening ahead.I’m already crocheting my second pair — olive green, with leather accents on the sole (pieces from an old purse my dog chewed up). Looks more expensive and interesting.If you want something with a bit more flair, check out the Pineapple Slippers crochet pattern on Creative Fabrica. It’s a paid pattern but absolutely gorgeous — textured pineapple stitch on the top, chunky yarn base, and they look like something from a boutique. Perfect step up from my basic beginner version. New users get 10 free downloads, so it’s worth browsing while you’re there.How I Use These Slippers
My everyday cozy moment — handmade slippers, fuzzy socks, and a good book.This is my daily uniform from October to March. Slippers on at 6 PM, off only when I go to bed. My husband laughed (“You crocheted yourself slippers?”), then asked for a pair in navy blue.I gifted one to my sister — tucked a chocolate bar inside with a note that said “handmade, hand wash cold, lay flat to dry.” She cried. Not sure if it was the gift or the washing instructions.I have three pairs now: oatmeal, gray, and that olive work-in-progress. Planning to make a couple for my nieces by New Year’s — I’ll add unicorn patches, they’ll lose their minds.Pin This for Later!
Save this free chunky crochet slipper pattern — perfect for weekend projects and handmade gifts!Crochet boldly, don’t be afraid to experiment, and remember: the best projects are the ones you can finish before bedtime. These slippers prove it.
YOU MIGHT ALSO LOVE
-